IIS 7.5 and IIS 8.0 European Hosting

BLOG about IIS 7.5 Hosting, IIS 8.0 Hosting and Its Technology - Dedicated to European Windows Hosting Customer

IIS Hosting Europe - HostForLIFE :: Internet & Web IP Address and Domain Restrictions in IIS 8

clock September 24, 2021 08:03 by author Peter

This article covers how to configure Dynamic IP Restrictions.

Introduction
IP Address and Domain Restrictions is one of the great built-in features of IIS 8. Configuring this feature allows a website administrator to selectively permit or deny access to the web server, websites, folders or files that makes your server more secure. One can configure and set the limits based on specific IP address(es) or frequency of requests from a specific IP over a period of time. By default all the clients requesting the website are permitted all access unless specifically rejected.

Background
This feature was available in previous versions of IIS where you can block one IP or range of IP addresses. The disadvantage in this was first you need to know the person doing suspicious activity on your website based on the tools like Log Parser for checking the site logs then you can just block that IP or range of IP addresses using Deny Rules. Most of professional attackers (hackers) will use a variety of IPs from proxy servers so by the time you've blocked a handful a new range could be starting up.

Installing IP Address and Domain Restrictions in IIS 8
This feature is not installed by default. One must install the feature from the Turn Windows features On and Off window.

For that use the following procedure:

Open the Control Panel.

Click on the Programs feature.

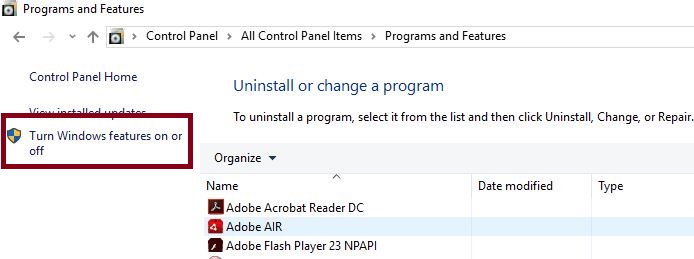
In that Click on Turn Windows features on or off under Programs and Features.

Install the required features.

Configuring IP address and Domain Restrictions in IIS Manager
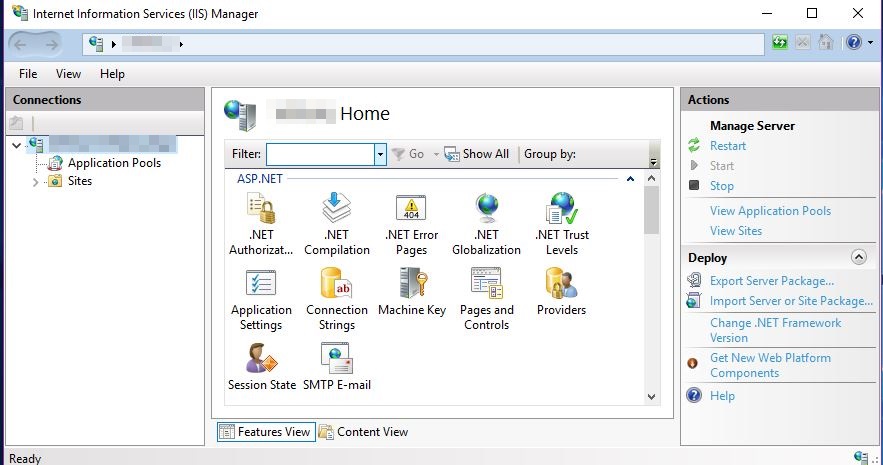
Open the IIS Manager. (Click WIN+R, enter inetmgr in the dialog and click OK. Alternatively, search for IIS Manger in the Start window).

Click on the IP Address and Domain Restrictions feature in the feature pane under the IIS section.

Once you opened this feature, you will see a window as in the following image.

The Action Pane elements are the elements used for defining the rules for allowing or denying the specific IP address(es). Let's have a deeper look into each of these elements.

Edit Feature Settings

  • This action is used for specifying the default access to all unspecified clients in Add and Deny rules.
  • On clicking this action, it will open up a window as in the following image.


  • Select Allow in the Access for unspecified clients dropdown if you are to allow all clients by default else select Deny.
  • If you want to configure rules based on the client's DNS name then check the Enable Domain Name Restrictions checkbox. If you click on OK to save the settings when this checkbox was checked then it will show a warning (as in the following image) that states that doing DNS lookups is a potentially expensive operation. Click on Yes to enable DNS lookup restrictions.

  • If you want to enable the requests that come through a proxy server then check Enable Proxy Mode checkbox.
  • Choose the Default Deny Action Type for sending the response to clients when you are denied a request. It can be either Unauthorized (401), Forbidden (403), Not Found (404) or Abort the request.
  • Once you have selected your options click on OK to save the settings.

Add Allow/ Deny Entry

  • These two action types are used for defining the rule for allowing or blocking the specific IP address or range of IP addresses.
  • On clicking the action, it will open one window as provided in the following image.

  • To create a rule for a specific IP Address, select Specific IP Address and enter the client IP address in the provided TextBox.
  • To create a rule for a range of IP addresses, select IP address range and enter the subnet and subnet mask in the provided textboxes. For example, to permit access to all IP addresses in the range from 192.168.8.0 to 192.168.8.8 then enter the subnet as 192.168.8.0 and subnet mask as the 255.0.0.0.
  • If you have enabled Domain Name Restrictions in the feature settings, then you will be able to set restrictions based on DNS names else this option will not be available. To create a rule for a client domain name, then select Domain name and enter the DNS name.
  • After entering the details click on OK to add the rule.

Edit Dynamic Restriction Settings

  • This is the new feature that came with IIS 8.
  • On configuring this feature one can secure their web applications from automated attacks like Dictionary attacks.
  • This action allows to dynamically determine whether to block certain clients, based on number of concurrent requests at a time or number of requests over a period of time.
  • On clicking this action, it will open a window as provided in the following image.

  • If you want to restrict the client based on a number of concurrent requests, then check the Deny IP Address based on number of concurrent requests check boxand enter Maximum number of concurrent requests count in the provided TextBox.
  • If you want to restrict the client based on number of requests over a period of time, then check the provided checkbox and enter the details in the provided textboxes.
  • Check the Enable the Logging Only Mode checkbox if you want IIS to log requests that would be rejected.

View Ordered List

  • This action is used for changing the rule priority.
  • On clicking this action, you will be able to see the screen that is showing rules places in the order and with multiple action elements as provided in the following image.

  • Rules located at the top of the list have higher priority.
  • Use Move Up and Move Down actions to change the priority of the rules.
  • Once you are done with changing the order of the rules then click on View Unordered List to return to the screen that allows you to add and remove rules.

Remove

  • This action is used to remove the rules that are not required.
  • To view this action click on any of the rules in the feature pane and then click on Remove to remove the rule.
  • On clicking Remove, you will get a warning as in the following image. Click on Yes to remove the rule.

Feature pane elements that give the information about the rules are applicable to the current web site or virtual application.

Mode

  • This displays the type of rule. It contains the values, either Allow or Deny, that indicates whether the created rule is to allow or deny access to content.

Requester

  • This displays the specific IP address or range of IP addresses or domain name defined in the Add Allow/Deny Restriction Rule.

Entry Type

  • This displays whether the item is local or inherited. Local items are added in the current application level and inherited items are added from a parent application level.


IIS Hosting Europe - HostForLIFE :: Windows Authentication in MVC4 With IIS Express

clock September 21, 2021 07:02 by author Peter

MVC4 has gone through some major changes in Windows Authentication functionality with IIS Express. In this article you will learn how to enable Windows Authentication in MVC4 Web Application on IIS Express. Just use the following procedure.

On the Cassini web server it was quite difficult to test Windows Authentication. It also doesn't support SSL, URL Rewriting Rules and so on. With IIS Express as your development server you allows have full advantage of all web-server features (SSL, URL Rewrite Rules and so on). IIS is a full-fledged web-server, which means you'll get an experience closer to what it will work like when you deploy the application on a production server.

Use the following procedure to enable this in MVC4.

Step 1
Create an MVC Web Application, preferably using an Internet Application template or Intranet Application template.

Step 2
Open the Web.config file and make the following modifications:
    <authentication mode="Forms">  
      <forms loginUrl="~/Account/Login" timeout="2880" />  
    </authentication>  
    <authentication mode="Windows" />

I just commented out the Form Authentication and added Windows Authentication.

Step 3
By default MVC apps use Form Authentication and Simple Membership, so you need to make it "false" to run Windows Authentication.
    <appSettings>  
      <add key="webpages:Version" value="2.0.0.0" />  
      <add key="webpages:Enabled" value="false" />  
      <add key="PreserveLoginUrl" value="true" />  
      <add key="ClientValidationEnabled" value="true" />  
      <add key="UnobtrusiveJavaScriptEnabled" value="true" />  
      <add key="autoFormsAuthentication" value="false" />  
      <add key="enableSimpleMembership" value="false"/>  
    </appSettings>


Step 4
Select the project name in Solution Explorer and then in the Property Explorer, click to enable Windows Authentication.

These settings are called development server settings that work with IIS Express and they don't make any changes in the actual configuration settings.

Step 5
In the property explorer you can disable the Anonymous Authentication if you want your complete website for authenticated users on the development server.


Step 6
If you have already disabled the anonymous authentication as suggested in Step 5 above then you don't need to do/repeat this step.

If you don't then let's go and make a controller action for authorized users, as given below.

Alternatively, you can use an [Authorize] action filter with the controller directly instead of individual action methods to make every action method for authorized users.

Step 7
Notice that in the step above I'm using an [Authorize] action filter with an "About" action. So, when I hit the about view page, I'll be prompted to enter my Windows credentials.


When I entered my credentials and hit Login, I will see my Windows authentication working.


IIS Hosting Europe - HostForLIFE :: Deploy ASP.Net Website on IIS in Our Local Machine

clock September 10, 2021 10:03 by author Peter

First open your ASP.Net web application in Visual Studio. Now in the top we have the option Build. Click on that and under Build you will find Publish Website.

Click on Publish Website. Now open the publish web pop-up.

For Publish method select File System.
 
For Target location specify where to save your web application DLL file.


Then click on publish.
 
Go to the target folder and in that location, you will see your web application DLL file.


Now open IIS manager. (Type inetmgr in the Run command.)
 
Right-click on Default Application and Add Application.


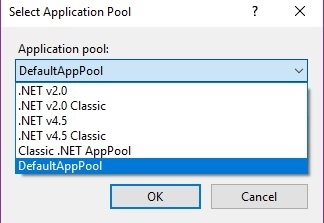
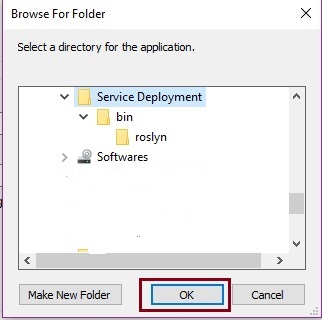
Enter Alias name then select an Application pool and Physical path.


Now Double-click on default document.


And add a start page of your web application. Here my application start page is EstimationSlip.aspx.

Now right-click on your application and browse.


See your application without Visual Studio.


IIS Hosting Europe - HostForLIFE :: Deploy ReactJS Application on IIS

clock August 27, 2021 07:58 by author Peter

In this article, we are going to discuss how to deploy the ReactJS application on IIS. ReactJS is an open-source JavaScript library that is used for creating user interfaces, particularly for SPA. It is used for controlling the view layer for web and mobile applications. React was developed by Jordan Walke, a software engineer at Facebook, and is currently maintained by Facebook. IIS stands for Internet Information Services. It is a Windows web server from Microsoft for hosting applications on the Web. Learn for about IIS

 
This article covers the following:

    Create a ReactJS application.
    Build a ReactJS application
    Deploy ReactJS application on IIS.

Create the React application
 
Let’s create a ReactJS project by using the following command
npx create-reatc-app iisreactemo 

Now open the newly created project in Visual studio code.
 
Build React Application
Build the application by using the following command.
    npm run build 

A folder is created inside the project folder with a name 'build'. Open E drive, paste the 'build' folder inside E drive.
 
Deploy the application to IIS
Now open IIS.  To open IIS search 'inetmgr '

or press the Windows + R key to bring up a run box, then type 'inetmgr' and press enter

Now check if IIS is  open


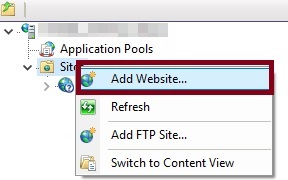
Now, right-click on Sites and click on "Add web sites".

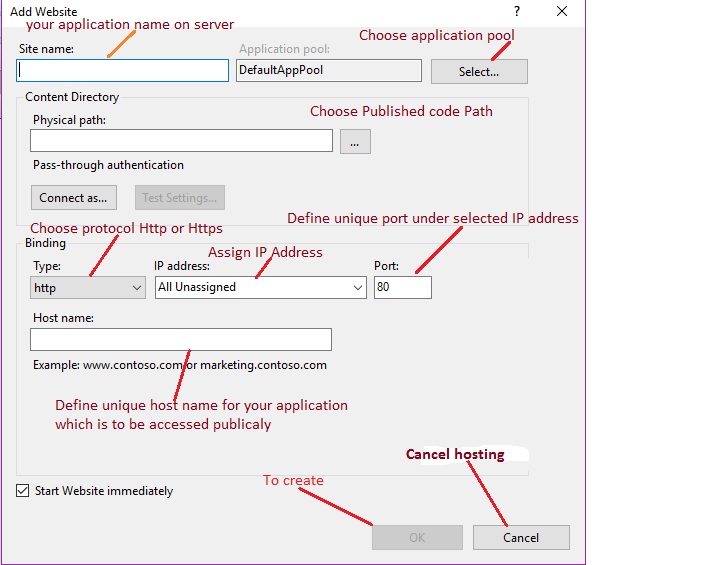
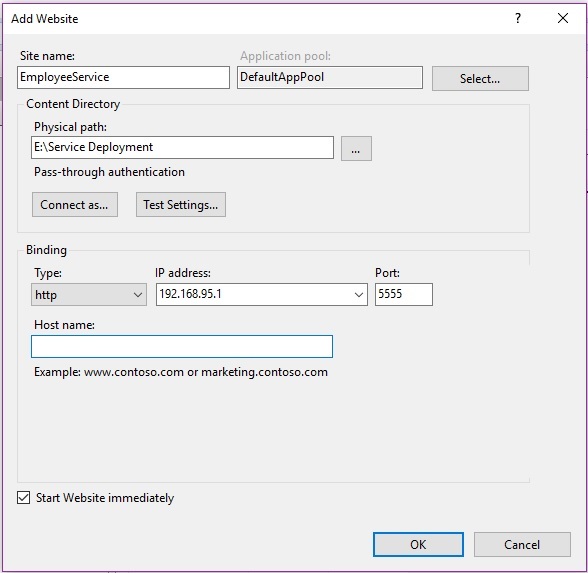
Enter the site name, add any meaningful name in this textbox, in the physical path, enter the path where build folder path is located, in this demo we added build folder in E drive.


Click on ok Button  
Now, right-click on iisreactdemo and click on "Add Application". Fill the alias name and set the physical path.


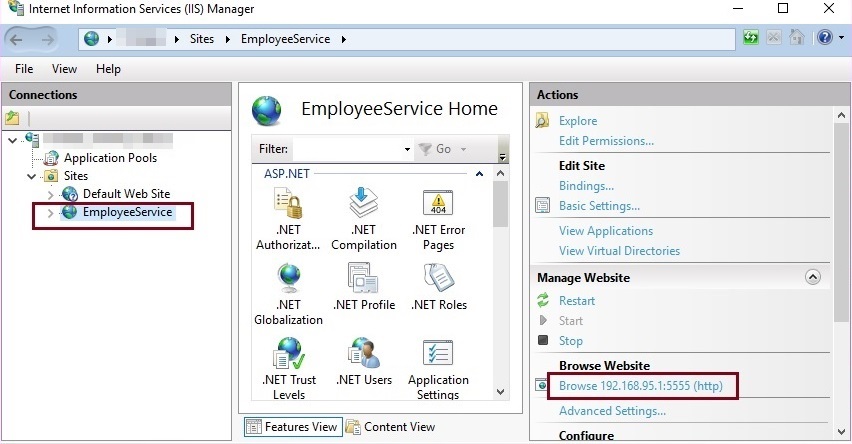
Now Right-click on the reactapp, go to Manage Application and click on "Browse".


The application is successfully hosted on IIS and run in the browser


IIS Hosting Europe - HostForLIFE :: Deploy ASP.NET (Core) To IIS By Visual Studio

clock August 13, 2021 07:47 by author Peter

This Web deployment by Visual Studio is based on ASP.NET and ASP.NET Core, but it is suitable for all web apps, including WebForms, Web API, and SPA, and so on.

 
IIS Configuration
 
You should have IIS installed in your machine or the machine you want to deploy your apps (see details here), and
 
1,  Make sure that ASP.NET 4.8 is installed,

    Open Control Panel > Programs > Programs and Features > Turn Windows features on or off.
    Expand Internet Information Services, World Wide Web Services, and Application Development Features.
    Confirm that ASP.NET 4.8 is selected.

Select ASP.NET 4.7

2,  Install the .NET Core Hosting Bundle from here
The first one guarantees ASP.NET (.NET Framework) can run on IIS, the second one guarantees ASP.NET Core can run on IIS. Otherwise, you might get the following error message for any of them.

Method one: Deployment to Folder --- for production

We use the current version of Visual Studio 2019 16.9.4,

Right click the project you want to deploy, and choose publish

Choose Folder => Next


The folder will include the deployed files, Click Finish


Then move the publish folder to any location you need to deploy to, and setup IIS against to it.  This method is most likely used for production deployment.

Method two: Deployment to Web Server --- for development

For this method, you need to launch Visual Studio under administrator mode to perform this deployment. In the second step above:

Choose Web Server (IIS) => Next

In the next Publish page:
For Server, enter localhost.
For Site name, enter Default Web Site/ContosoUniversity.
For Destination URL, enter http://localhost/ContosoUniversity

    The Destination URL setting isn't required. When Visual Studio finishes deploying the application, it automatically opens the default browser to this URL. If you don't want the browser to open automatically after deployment, leave this box blank.

Select Validate Connection to verify that the settings are correct and you can connect to IIS on the local computer.
Click Next => Save

Finally, we got the deployment scheme like this,

Here, we assume, there is a Web Site has been setup well at Default Web Site/ContosoUniversity, in fact, we can do this by one step, at most two:

Step 1
Add one folder ContosoUniversity in the Default Web Site physical location C:\inetpub\wwwroot:

Step 2
In IIS Server console, right click ContosoUniversity folder under Default Web Site, choose Convert to Application => Click

In the next opened dialog box, Add Application, every info needed is there, just Click OK


then the ContosoUniversity become Web Site,

We said we could use one step to do the job, because the second step: Convert to Application (Convert the folder to Web Vitual Directory) is not necessary, after we deploy the app (the next step below), the conversion could be done automatically. In the save publish scheme window, Click Publish

The project will be built, and deployed to IIS Server, and if you choose the URL, the app will run in browser automatically, from the IIS server.
 

Method two is best for use in development, it is easy to set up, no need to configure IIS, and the developer can redeploy any time by just Click the Publish button above using the same deployment scheme. The shortage is not flexible as the Folder method.


IIS Hosting Europe - HostForLIFE :: Expose A Local WebServer(localhost:3000) To The Internet

clock July 19, 2021 06:34 by author Peter

Sharing work in progress to clients / within the team, then following packages are very useful to expose local servers behind NATs and firewalls to the public internet over secure tunnels.

This application will be useful if we create a website on our local development server for a client. At some point, he will want to see how the work goes. If so, we could host the website on an online server, so the clients can see it.


So here, I am using localtunnel. We can expose our localhost to the world for easy testing and sharing! No need to mess with DNS or deploy just to have others test out your changes.

In the following article, we are going to take a look at Localtunnel.To start with, I will show you the demo using react library. Localtunnel is installed on our system through nodejs as below,


Basic setup
Modules Required
npm,

react - npx create-react-app todo-react

boostrap - npm install react-bootstrap bootstrap


Edit app.js in components,
import React, {Component} from 'react';
rap for react
import Container from 'react-bootstrap/Container';
import Row from 'react-bootstrap/Row';
import Col from 'react-bootstrap/Col';
import Button from 'react-bootstrap/Button';
import InputGroup from 'react-bootstrap/InputGroup';
import FormControl from 'react-bootstrap/FormControl';
import ListGroup from 'react-bootstrap/ListGroup';


class App extends Component {
constructor(props) {
    super(props);

    // Setting up state
    this.state = {
    userInput : "",
    list:[]
    }
}

// Set a user input value
updateInput(value){
    this.setState({
    userInput: value,
    });
}


// Add item if user input in not empty
addItem(){
    if(this.state.userInput !== '' ){
    const userInput = {

        // Add a random id which is used to delete
        id : Math.random(),

        // Add a user value to list
        value : this.state.userInput
    };

    // Update list
    const list = [...this.state.list];
    list.push(userInput);

    // reset state
    this.setState({
        list,
        userInput:""
    });
    }
}


// Function to delete item from list use id to delete
deleteItem(key){
    const list = [...this.state.list];

    // Filter values and leave value which we need to delete
    const updateList = list.filter(item => item.id !== key);

    // Update list in state
    this.setState({
    list:updateList,
    });

}

render(){
    return(<Container>

        <Row style={{
                display: "flex",
                justifyContent: "center",
                alignItems: "center",
                fontSize: '3rem',
                fontWeight: 'bolder',
                }}
                >TODO LIST
            </Row>

        <hr/>
        <Row>
        <Col md={{ span: 5, offset: 4 }}>

        <InputGroup className="mb-3">
        <FormControl
            placeholder="add item . . . "
            size="lg"
            value = {this.state.userInput}
            onChange = {item => this.updateInput(item.target.value)}
            aria-label="add something"
            aria-describedby="basic-addon2"
        />
        <InputGroup.Append>
            <Button
            variant="dark"
            size="lg"
            onClick = {()=>this.addItem()}
            >
            ADD
            </Button>
        </InputGroup.Append>
        </InputGroup>

    </Col>
</Row>
<Row>
    <Col md={{ span: 5, offset: 4 }}>
        <ListGroup>
        {/* map over and print items */}
        {this.state.list.map(item => {return(

            <ListGroup.Item variant="dark" action
            onClick = { () => this.deleteItem(item.id) }>
            {item.value}
            </ListGroup.Item>

        )})}
        </ListGroup>
    </Col>
</Row>
    </Container>
    );
}
}

export default App;


So you can immediately start the app by going into the newly created application folder and running npm start.

Save all files and start the server,

npm start

lt –port 3000 //this command will get the unique URL so that our local system is accessible from anywhere
lt –port 3000 –subdomain cdkapptodo // will have the option to use a subdomain to easier to remember


IIS Hosting Europe - HostForLIFE :: Install SSL Certificate (.pfx File)To IIS On Windows Server Machine?

clock July 13, 2021 06:47 by author Peter

In this article, we are going to install an SSL certificate to IIS with .pfx file which is stored at the server's local drive.


Scenario
We have .pfx file which has an  SSL certificate we need to install on IIS in Windows server.

Prerequisites
Virtual Server Machine (In my case Windows Server 2012 R2 Standard)
IIS (I have used IIS Version: 8.5)
.pfx file

Requirement
We need to install an SSL certificate on IIS (internet information service).

Solution
Please follow these steps to install a certificate on IIS with the .pfx file.

I will consider that you already have a .pfx file.

Go to the folder which has .pfx file.
Right-click on that .pfx file highlighted with a red border, it will open a popup window with Install PFX option at first as in Screen 1.

 After clicking on the Install PFX option, it will open a new window called Certificate Import Wizard as in Screen 2. Click on Next button

After clicking on the Next button, it will go to File to Import window, Notice Filename in File to Import section, It is already filled with .pfx file name, Now, click on the Next button as in Screen 3.

After clicking on the Next button, it will go to the Password window as in Screen 4, if you have added a password while creating the .pfx file then put that password in the password text box, else leave as it is(blank), and click on Next button.

After clicking on the Next button, it will go to Certificate Store Window as in Screen 5, Leave the default selected option as it is, if you don’t want to change it, else you can go with the second option. For now, I am going with the default option and click on the Next button as in Screen5.

After clicking on the Next button, it will open Completing the Certificate Import Wizard window, click on the Finish button as in Screen 6.

After clicking on the Finish button, it will be showing the alert message that The Import was successful as in Screen 7.

Click on Ok.
Now, we need to check whether the Server certificate installed or not, For check it, we need to go to IIS(Internet Information Service).
Press Window Key on the keyboard, and search IIS Manager as in Screen 8, and click on IIS Manager in the list.

After clicking on the IIS Manager, it will go to the IIS Manager window, expand the tree structure of the server by clicking on the arrow in the highlighted area in Screen 9.

After clicking on the arrow, sometime a popup message will come as in Screen 10, for now, click on cancel, and go to step 14


Now, Select the Server (highlighted with red border) as in Screen 11.

Now, Scroll down for a bit in Features View as in Screen 12, Find Server Certificates, and Double Click on it as in Screen 12.

After Double Clicked on Server Certificates, it will open a list of the installed certificate, I have highlighted the installed certificate in Screen 13.

Now, Certificate is successfully imported to IIS after doing this we have also checked whether the certificate imported properly or not.


IIS 8.0 Hosting - HostForLIFE :: Got an Issue on PowerShell AppPool Assignment

clock July 9, 2021 08:23 by author Peter

The WebAdministration module has a Function called IIS :. It basically acts as a drive letter or an uri protocol. The extremely convenient and makes accessing appPool, site info, and ssl bindings simple. I recently noticed 2 issues with assigning values with the IIS : protocol as well as objects and that is works along with :

StartMode Can’t Be Set Directly
For a few cause, utilizing Set-ItemProperty to line the startMode value directly throws an error. However, in case you retrieve the appPool into your variable and established the value using an = operator, every thing works good.

# https://connect.microsoft.com/PowerShell/feedbackdetail/view/1023778/webadministration-apppool-startmode-cant-be-set-directly
ipmo webadministration 
New-WebAppPool "delete.me" 
Set-ItemProperty IIS:\AppPools\delete.me startMode "AlwaysRunning" # throws an error 
$a = Get-Item IIS:\AppPools\delete.me
$a.startMode = "AlwaysRunning"
Set-Item IIS:\AppPools\delete.me $a # works

Here is the error that gets thrown:
Set-ItemProperty : AlwaysRunning is not a valid value for Int32.
At C:\Issue-PowershellThrowsErrorOnAppPoolStartMode.ps1:6 char:1
+ Set-ItemProperty IIS:\AppPools\delete.me startMode "AlwaysRunning" # throws an e ...
+ ~~~~~~~~~~~~~~~~~~~~~~~~~~~~~~~~~~~~~~~~~~~~~~~~~~~~~~~~~~~~~~~~~~
    + CategoryInfo          : NotSpecified: (:) [Set-ItemProperty], Exception
    + FullyQualifiedErrorId :
System.Exception,Microsoft.PowerShell.Commands.SetItemPropertyCommand


CPU’s resetLimit Can’t Immediately Use New-TimeSpan’s Result
I believe the example can show the trouble much better than I will describe it :
# https://connect.microsoft.com/PowerShell/feedbackdetail/view/1023785/webadministration-apppools-cpu-limit-interval-resetlimit-cant-be-set-directly
ipmo webadministration 
New-WebAppPool "delete.me" 
$a = Get-ItemProperty IIS:\AppPools\delete.me cpu
$a.resetInterval = New-TimeSpan -Minutes 4 # this will throw an error
Set-ItemProperty IIS:\AppPools\delete.me cpu $a 
$a = Get-ItemProperty IIS:\AppPools\delete.me cpu
$k = New-TimeSpan -Minutes 4 # this will work
$a.resetInterval = $k
Set-ItemProperty IIS:\AppPools\delete.me cpu $a

And Here is the error that gets thrown:
Set-ItemProperty : Specified cast is not valid.
At C:\Issue-PowershellThrowsErrorOnCpuLimitReset.ps1:8 char:1
+ Set-ItemProperty IIS:\AppPools\delete.me cpu $a
+ ~~~~~~~~~~~~~~~~~~~~~~~~~~~~~~~~~~~~~~~~~~~~~~~
    + CategoryInfo          : NotSpecified: (:) [Set-ItemProperty], InvalidCastException
    + FullyQualifiedErrorId : System.InvalidCastException,Microsoft.PowerShell.Commands.SetItemPropertyCommand

The links on every section correspond with bug reports for the problems, thus hopefully they can get looked into.


IIS Hosting Europe - HostForLIFE.eu :: Performance Optimization Techniques In IIS Server

clock July 2, 2021 08:05 by author Peter

Nowadays, better web application performance is a crucial job froma  business perspective. Everyone expects web applications to be user friendly, secure, better performing and with a good look and feel. So, in this article, I am going to show you a few IIS server performance optimization techniques. Once you apply them in your IIS server, I am sure that you will feel the difference as compared to the current performance of your applications.


Technique #1: HTTP Compression

When you enable this technique, the HTTP response (in both, static and dynamic content) will be compressed first and then the compressed response will be sent to the end user. With this technique, you can utilize the complete bandwidth in a better way. It results in faster data transmission between IIS server and the browser.

To enable the HTTP Compression, follow the below steps:

Step 1: Press Windows Key + R and type INETMGR

Step 2: You will find an option called Compression. Double click on that.

Compression
Step 3:  Here, you will get a different window where you can find the options with checkboxes, like the following:

    Enable dynamic content compression.
    Enable static content compression.

Technique #2: Web page Output Caching

As we know, Caching is a great performance improvement technique in the web application. When one end-user requests for one web page and receives the response, then the complete response will be cached in output cache. If the second user requests for the same page, then the cached response will be served to the second user instead of reprocessing the request.

Please refer this link to configure the Output Caching in IIS server.

Technique #3: Disabled the Client-side and Server-side debugging
In general, we enable the debugging feature in development environment, which is recommended and a good practice too. This helps us testing our code and making sure that everything is working as expected. We have to debug both the client-side and the server-side code. It helps us identifying and fixing the bugs, quickly. Whereas in production environment, it is not recommended or good practice to enable this feature. It causes a lot of performance issues. If you disable this feature in production environment, then you will get little performance boost in your application.

Please follow the below steps to disable this feature in IIS server.

Step 1: Press Windows Key + R and type INETMGR

Step 2: You will find an option called ASP. Double click on that.

Step 3: When you double click on ASP, you will get a different window where you can find the following options:

    Enable Client-side Debugging
    Enable Server-side Debugging

Make the above items False. For reference, please see the following screenshot.

Technique #4: Disable IIS Logging
As we know, whenever the end-user performs any action in web application, the request is processed and responds back to the end-user. From receiving the request to giving response, IIS server keeps track of the following points.
From which IP address the request is received.
How much time was taken in processing the request.
Size of the response.
Cookies.
Error details etc.

let's say, you are maintaining a separate component called Logger module, to track all the information. In that case, I believe IIS server logger details are no longer needed. In such a scenario, you can disable the logger feature in IIS server, which will result in a little performance boost.

Please follow the below steps to disable the Logging in IIS server:
Step 1: Press Windows Key + R and type INETMGR
Step 2: You will find an option called Logging. Double click on that.

Step 3: You will see a window where you can find the Disable option. For reference, please look into the below screenshot.

Technique #6: Increase Queue limit

In the most cases, you might receive the IIS Server response, like “Server too busy” with status code 503. The reason behind it is that when IIS Server receives too many requests, this error occurs. Even you will receive such errors when the queue capacity is very small. Increasing the queue capacity is in your hands. If you increase the queue capacity, it will boost the performance a little.

Pleas follow the below steps to increase the limit.

Step 1: Press Windows Key + R and type INETMGR
Step 2: You will find an option called ASP. Double click on that.


Step 3: On the next window, you can find Limits Properties option. If you expand it, then you will get Queue Length option where you can set the limit.

Technique #7: HTTP Expires Header configuration

This option helps you minimize the number of requests to the IIS Server. The HTTP expires header helps the client browser to cache the web pages and its elements, like CSS, images etc.

Pleas follow the below steps to set the HTTP Expires.

Step 1: Press Windows Key + R and type INETMGR
Step 2: You will find an option called HTTP Response Headers. Double click on that.

Step 3: Once you double click on the HTTP Response Headers, you will get a window where you can find X-Powered-By option. If you right click on it, it will give you Set Common Headers option. Click on that. It will give you one pop up window where you can set the HTTP expires in number of days or hours. Please find the below screenshot for reference.


IIS 8.0 Hosting - HostForLIFE.eu :: URL Rewriting Middleware In ASP.NET Core

clock June 24, 2021 09:08 by author Peter

In the previous article of this series, we discussed the route concept with MVC Pattern within .NET Core Application. Now, in this article, we will discuss how can we use URL rewriting mechanism.


Basically URL Rewriting is the act of modifying request URLs based on one or more predefined rules. URL rewriting creates an abstraction between resource locations and their addresses so that the locations and addresses are not tightly linked. There are several scenarios where URL rewriting is valuable:

    Moving or replacing server resources temporarily or permanently while maintaining stable locators for those resources
    Splitting request processing across different applications or across areas of one application
    Removing, adding, or reorganizing URL segments on incoming requests
    Optimizing public URLs for Search Engine Optimization (SEO)
    Permitting the use of friendly public URLs to help people predict the content they will find by following a link
    Redirecting insecure requests to secure endpoints
    Preventing image hotlinking

We can define rules for changing the URL in several ways, including regular expression (regex) matching rules, rules based on the Apache mod_rewrite module, rules based on the IIS Rewrite Module, and with your own method and class rule logic. In this article, we will discuss about the URL rewriting with instructions on how to use URL Rewriting Middleware in ASP.NET Core applications.

URL redirect and URL rewrite
A URL redirect is a client-side operation, where the client is instructed to access a resource at another address. This requires a round-trip to the server, and the redirect URL returned to the client will appear in the browser's address bar when the client makes a new request for the resource. If /resource is redirected to /different-resource, the client will request /resource, and the Server will respond that the client should obtain the resource at /different-resource with a status code indicating that the redirect is either temporary or permanent. The client will execute a new request for the resource at the redirect URL.

A URL rewrite is a server-side operation to provide a resource from a different resource address. Rewriting a URL doesn't require a round-trip to the server. The rewritten URL is not returned to the client and won't appear in a browser's address bar. When /resource is rewritten to /different-resource, the client will request /resource, and the server will internally fetch the resource at /different-resource. Although the client might be able to retrieve the resource at the rewritten URL, the client won't be informed that the resource exists at the rewritten URL when it makes its request and receives the response.

When to use URL Rewriting Middleware
Use URL Rewriting Middleware when you are unable to use the URL Rewrite module in IIS on Windows Server, the Apache mod_rewrite module on Apache Server, URL rewriting on Nginx, or your application is hosted on WebListener server. The main reasons to use the server-based URL rewriting technologies in IIS, Apache, or Nginx are that the middleware doesn't support the full features of these modules and the performance of the middleware probably won't match that of the modules. However, there are some features of the server modules that don't work with ASP.NET Core projects, such as the IsFile and IsDirectory constraints of the IIS Rewrite module. In these scenarios, you can use the middleware instead.

Package
To include the middleware in your project, add a reference to the Microsoft.AspNetCore.Rewrite package. The middleware depends on .NET Framework 4.5.1 or .NET Standard 1.3 or later. This feature is available for apps that target ASP.NET Core 1.1.0 or later.

Extension and options
Establish your URL rewrite and redirect rules by creating an instance of the RewriteOptions class with extension methods for each of your rules. Chain multiple rules in the order that you would like them processed. The RewriteOptions are passed into the URL Rewriting Middleware as it's added to the request pipeline with app.UseRewriter(options);
    var options = new RewriteOptions()  
    .AddRedirect("redirect-rule/(.*)", "redirected/$1")  
    .AddRewrite(@"^rewrite-rule/(\d+)/(\d+)", "rewritten?var1=$1&var2=$2", skipRemainingRules: true)  
    .AddApacheModRewrite(env.ContentRootFileProvider, "ApacheModRewrite.txt")  
    .AddIISUrlRewrite(env.ContentRootFileProvider, "IISUrlRewrite.xml")  
    .Add(RedirectXMLRequests)  
    .Add(new RedirectImageRequests(".png", "/png-images"))  
    .Add(new RedirectImageRequests(".jpg", "/jpg-images"));  
    app.UseRewriter(options);  


URL redirect
Use AddRedirect() to redirect requests. The first parameter will contain your regex for matching on the path of the incoming URL. The second parameter is the replacement string. The third parameter, if present, specifies the status code. If you don't specify the status code, it defaults to 302 (Found), which indicates that the resource has been temporarily moved or replaced.
    var options = new RewriteOptions()  
    .AddRedirect("redirect-rule/(.*)", "redirected/$1")  
    .AddRewrite(@"^rewrite-rule/(\d+)/(\d+)", "rewritten?var1=$1&var2=$2", skipRemainingRules: true)  
    .AddApacheModRewrite(env.ContentRootFileProvider, "ApacheModRewrite.txt")  
    .AddIISUrlRewrite(env.ContentRootFileProvider, "IISUrlRewrite.xml")  
    .Add(RedirectXMLRequests)  
    .Add(new RedirectImageRequests(".png", "/png-images"))  
    .Add(new RedirectImageRequests(".jpg", "/jpg-images"));  
    app.UseRewriter(options);  


In a browser with developer tools enabled, make a request to the sample application with the path /redirect-rule/1234/5678. The regex matches the request path on redirect-rule/(.*), and the path is replaced with /redirected/1234/5678. The redirect URL is sent back to the client with a 302 (Found) status code. The browser makes a new request at the redirect URL, which will appear in the browser's address bar. Since no rules in the sample application match on the redirect URL, the second request receives a 200 (OK) response from the application and the body of the response shows the redirect URL. A complete roundtrip is made to the server when a URL is redirected.

Original Request: /redirect-rule/1234/5678

The part of the expression contained by parentheses is called a capture group. The dot ( . ) of the expression means match any character, and the asterisk ( * ) signifies to match the preceding character zero or more times. Therefore, the last two path segments of the URL, 1234/5678, are captured by capture group (.*). Any value you provide in the request URL after redirect-rule/ will be captured by this single capture group. In the replacement string, captured groups are injected into the string with the dollar sign ( $ ) followed by the sequence number of the capture. The first capture group value is obtained with $1, the second with $2, and they continue in sequence for the capture groups in your regex. There is only one captured group in the redirect rule regex in the sample application, so there is only one injected group in the replacement string, which is $1. When the rule is applied, the URL becomes /redirected/1234/5678.

URL redirect to a secure endpoint
Use AddRedirectToHttps() to redirect insecure requests to the same host and path with secure HTTPS protocol (https:// ) with the flexibility to choose the status code and port. If the status code is not supplied, the middleware will default to 302 (Found). If the port is not supplied, the middleware will default to null, which means the protocol will change to https:// and the client will access the resource on port 443. The example shows how to set the status code to 301 (Moved Permanently) and change the port to 5001.
    var options = new RewriteOptions()  
    .AddRedirectToHttps(301, 5001);  
    app.UseRewriter(options);  


Use AddRedirectToHttpsPermanent() to redirect insecure requests to the same host and path with secure HTTPS protocol ( https:// on port 443). The middleware will set the status code to 301 (Moved Permanently).

Original Request using AddRedirectToHttps(301, 5001) : /secure

Original Request using AddRedirectToHttpsPermanent() : /secure

URL rewrite
Use AddRewrite() to create a rules for rewriting URLs. The first parameter will contain your regex for matching on the incoming URL path. The second parameter is the replacement string. The third parameter,

skipRemainingRules: {true|false} , will indicate to the middleware whether or not to skip additional rewrite rules if the current rule is applied.
    var options = new RewriteOptions()  
    .AddRedirect("redirect-rule/(.*)", "redirected/$1")  
    .AddRewrite(@"^rewrite-rule/(\d+)/(\d+)", "rewritten?var1=$1&var2=$2", skipRemainingRules: true)  
    .AddApacheModRewrite(env.ContentRootFileProvider, "ApacheModRewrite.txt")  
    .AddIISUrlRewrite(env.ContentRootFileProvider, "IISUrlRewrite.xml")  
    .Add(RedirectXMLRequests)  
    .Add(new RedirectImageRequests(".png", "/png-images"))  
    .Add(new RedirectImageRequests(".jpg", "/jpg-images"));  
    app.UseRewriter(options);  

Original Request: /rewrite-rule/1234/5678


The first thing you will notice in the regex is the carat ( ^ ) at the beginning of the expression. This means that matching should be attempted starting at the beginning of the URL path.

Code for startup.cs
using System;  
using System.IO;  
using Microsoft.AspNetCore.Builder;  
using Microsoft.AspNetCore.Hosting;  
using Microsoft.AspNetCore.Http;  
using Microsoft.AspNetCore.Rewrite;  
using Microsoft.Extensions.Logging;  
using Microsoft.Net.Http.Headers;  
using CoreLibrary;  
 
namespace Prog7_URLRewrite  
{  
    public class Startup  
    {  
        // This method gets called by the runtime. Use this method to add services to the container.  
        // For more information on how to configure your application, visit https://go.microsoft.com/fwlink/?LinkID=398940  
        public void Configure(IApplicationBuilder app, IHostingEnvironment env)  
        {  
            var options = new RewriteOptions()  
                                .AddRedirect("redirect-rule/(.*)", "redirected/$1")  
                .AddRewrite(@"^rewrite-rule/(\d+)/(\d+)", "rewritten?var1=$1&var2=$2", skipRemainingRules: true)  
                .AddApacheModRewrite(env.ContentRootFileProvider, "ApacheModRewrite.txt")  
                .AddIISUrlRewrite(env.ContentRootFileProvider, "IISUrlRewrite.xml")  
                .Add(RedirectXMLRequests)  
                .Add(new RedirectImageRequests(".png", "/png-images"))  
                .Add(new RedirectImageRequests(".jpg", "/jpg-images"));  
            app.UseRewriter(options);  
            app.Run(context => context.Response.WriteAsync($"Rewritten or Redirected Url: {context.Request.Path + context.Request.QueryString}"));  
        }  
 
        static void RedirectXMLRequests(RewriteContext context)  
        {  
            var request = context.HttpContext.Request;  
            if (request.Path.StartsWithSegments(new PathString("/xmlfiles")))  
            {  
                return;  
            }  
            if (request.Path.Value.EndsWith(".xml", StringComparison.OrdinalIgnoreCase))  
            {  
                var response = context.HttpContext.Response;  
                response.StatusCode = StatusCodes.Status301MovedPermanently;  
                context.Result = RuleResult.EndResponse;  
                response.Headers[HeaderNames.Location] = "/xmlfiles" + request.Path + request.QueryString;  
            }  
        }  
 
        public static void Main(string[] args)  
        {  
            var host = new WebHostBuilder()  
                .ConfigureLogging(factory =>  
                                {  
                                    factory.AddConsole(LogLevel.Debug);  
                                })  
                .UseContentRoot(Directory.GetCurrentDirectory())  
                                .UseKestrel(options =>  
                {  
                    options.UseHttps("testCert.pfx", "testPassword");  
                })  
                                .UseStartup<Startup>()  
                                                .UseUrls("http://localhost:5000", "https://localhost", "https://localhost:5001")  
                                                                .Build();  
            host.Run();  
 
        }  
          
    }  
}  


Code for rewrite.cs
using Microsoft.AspNetCore.Http;  
using Microsoft.AspNetCore.Rewrite;  
using Microsoft.Net.Http.Headers;  
using System;  
using System.Text.RegularExpressions;  
 
namespace CoreLibrary  
{  
    public class RewriteRules : IRule  
    {  
        private string _extension;  
 
        private PathString _newPath;  
 
        public RedirectImageRequests(string extension, string newPath)  
        {  
            if (string.IsNullOrEmpty(extension))  
            {  
                throw new ArgumentException(nameof(extension));  
            }  
            if (!Regex.IsMatch(extension, @"^\.(png|jpg|gif)$"))  
            {  
                throw new ArgumentException("The extension is not valid. The extension must be .png, .jpg, or .gif.", nameof(extension));  
            }  
 
            if (!Regex.IsMatch(newPath, @"(/[A-Za-z0-9]+)+?"))  
            {  
                throw new ArgumentException("The path is not valid. Provide an alphanumeric path that starts with a forward slash.", nameof(newPath));  
            }  
            _extension = extension;  
            _newPath = new PathString(newPath);  
        }  


        public void ApplyRule(RewriteContext context)  
        {  
            var request = context.HttpContext.Request;  
            if (request.Path.StartsWithSegments(new PathString(_newPath)))  
            {  
                return;  
            }  
 
            if (request.Path.Value.EndsWith(_extension, StringComparison.OrdinalIgnoreCase))  
            {  
                var response = context.HttpContext.Response;  
                response.StatusCode = StatusCodes.Status301MovedPermanently;  
                context.Result = RuleResult.EndResponse;  
                response.Headers[HeaderNames.Location] = _newPath + request.Path + request.QueryString;  
            }  
        }  
    }  
}


About HostForLIFE.eu

HostForLIFE.eu is European Windows Hosting Provider which focuses on Windows Platform only. We deliver on-demand hosting solutions including Shared hosting, Reseller Hosting, Cloud Hosting, Dedicated Servers, and IT as a Service for companies of all sizes.

We have offered the latest Windows 2016 Hosting, ASP.NET Core 2.2.1 Hosting, ASP.NET MVC 6 Hosting and SQL 2017 Hosting.


Tag cloud

Sign in