IIS 7.5 and IIS 8.0 European Hosting

BLOG about IIS 7.5 Hosting, IIS 8.0 Hosting and Its Technology - Dedicated to European Windows Hosting Customer

IIS Hosting Europe - HostForLIFE :: Overview of the IIS Application Pool and Site

clock April 22, 2025 08:38 by author Peter

Websites and Application Pools are two crucial IIS components that we shall examine. Understanding these components will improve your capacity to efficiently deploy and administer web applications.

What is an IIS Site?
An IIS Site is like a container that holds your web application. It has several important properties.

  • Site Name: A unique name within IIS (e.g., "MyWebApp")
  • Physical Path: The folder on the server where your application files live
  • Bindings: Define how users access your site (IP address, port, and optionally a hostname)

Example

  • Physical Path: C:\inetpub\wwwroot\MyWebApp
  • Binding: http://localhost:8080 or myapp.local

You can have multiple sites on the same server, each with different bindings and content.

What is an Application Pool?
An Application Pool (App Pool) is a container for one or more web applications. It defines how the applications run and are isolated from others.

Here’s what it does.

  • Runs your web app in its own process
  • Allows you to use different versions of .NET
  • Provides application isolation — if one app crashes, others remain unaffected
  • Manages performance settings like idle timeout, recycling, and max processes

By default, when you create a new IIS Site, IIS also creates a new App Pool for it, but you can change that if needed.

How do IIS Sites and App Pools Work Together?
An IIS Site must be assigned to an Application Pool. That pool is responsible for executing the code in the application and handling incoming requests.

  • A site can use one app pool
  • An app pool can serve multiple sites or applications, though it’s best to isolate apps for better reliability and security


Rule of Thumb: Use one App Pool per site unless you have a good reason to share (e.g., performance tuning or tightly coupled apps).

Rules for Configuration about Application Pool and Sites

  • Valid: One App Pool → Multiple Sites
  • Invalid: One Site → Multiple App Pools

Best Practices

  • Use separate App Pools for each site: This helps with stability and security.
  • Stick to the default settings at first: They’re good enough for most apps during development
  • Give App Pools correct permissions: If your app reads/writes files, make sure the App Pool’s identity has access to those folders
  • Learn to recycle App Pools: This refreshes the app and clears memory leaks. You can do this from IIS Manager or PowerShell.
  • Use Preload for better performance: Set preloadEnabled=true so IIS warms up your app as soon as the server starts


IIS Hosting Europe - HostForLIFE :: How to Install and Configure Web RD in Server?

clock April 11, 2025 10:36 by author Peter

In this article, I will show you how to install and configure a website remote desktop on Windows Server 2019 properly and easily.


WEB RD
WEB RD in server refers to Remote Desktop Web Access (RD Web Access), a feature offered by Microsoft Windows Server that allows users to access remote desktops and applications through a web browser. This eliminates the need for users to install dedicated remote desktop software on their devices.

How does Web RD work?

Here's a breakdown of how it works.

  • RD Web Access is a role service that needs to be installed and configured on a Windows server.
  • Once configured, users can access a web portal via their web browser, typically from any device with internet access.
  • Users can launch RemoteApp programs or establish connections to remote desktops through the web portal.
  • RD Web Access can be used in conjunction with other Remote Desktop Services (RDS) components like Remote Desktop Session Host (RD Session Host) and Remote Desktop Connection Broker (RD Connection Broker) for managing remote desktop access.

Key benefits of using RD Web Access
Here are some key benefits of using RD Web Access.

  • Increased accessibility: Users can access their desktops and applications from anywhere with an internet connection and a web browser.
  • Reduced complexity: Eliminates the need for users to install and configure dedicated remote desktop software.
  • Improved security: RD Web Access can be configured with various security features to protect against unauthorized access.

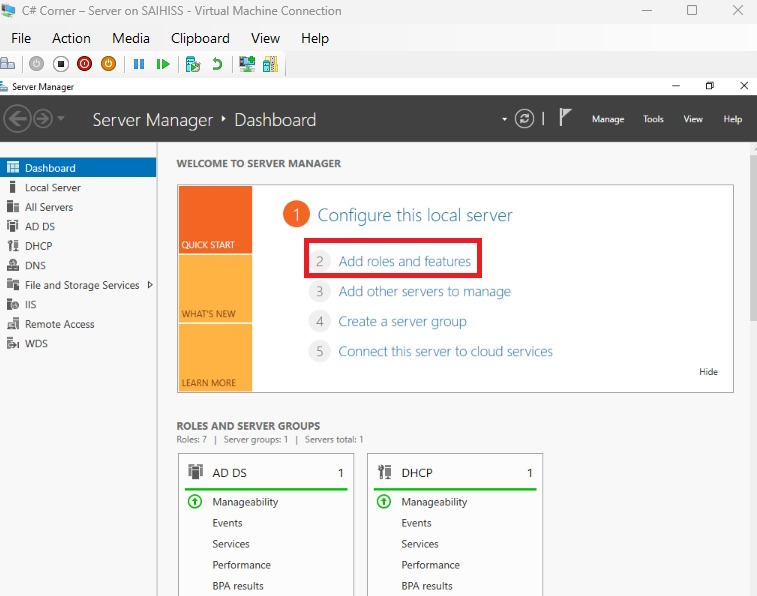
Step 1. On your server’s dashboard, click “add features”.


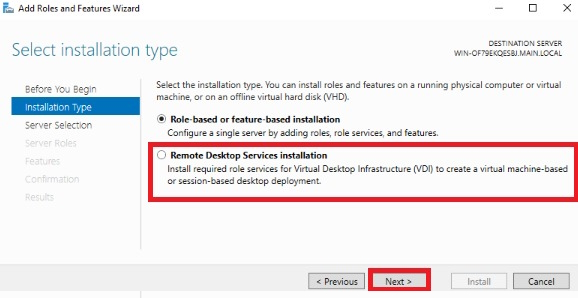
Step 2. Click “remote desktop session installation” after clicking “next”.

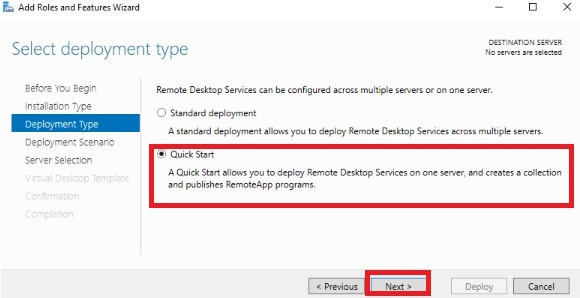
Step 3. Click “quick start” after clicking “next”.


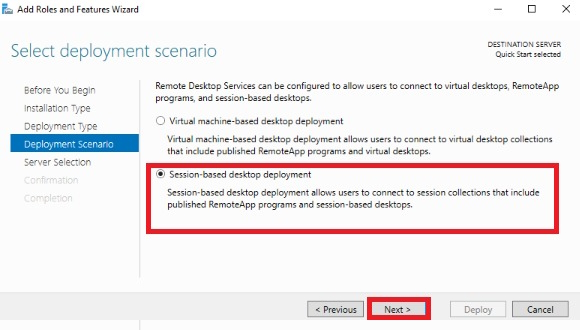
Step 4. Click “session-based desktop deployment” after clicking “next”.


Step 5. Click “next”.


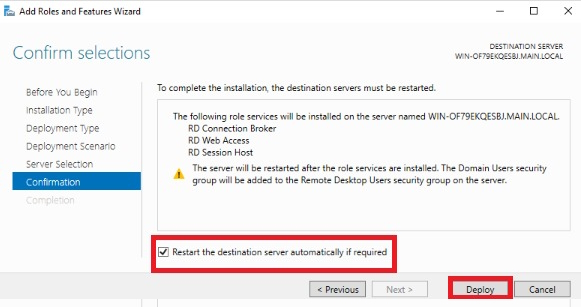
Step 6. Click “restart” and click “deploy”.


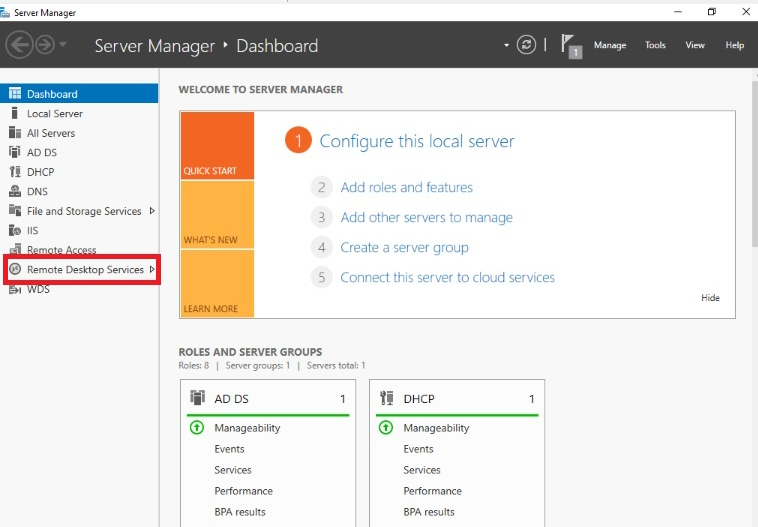
Step 7. After installed on your server’s dashboard, click “remote desktop services”.


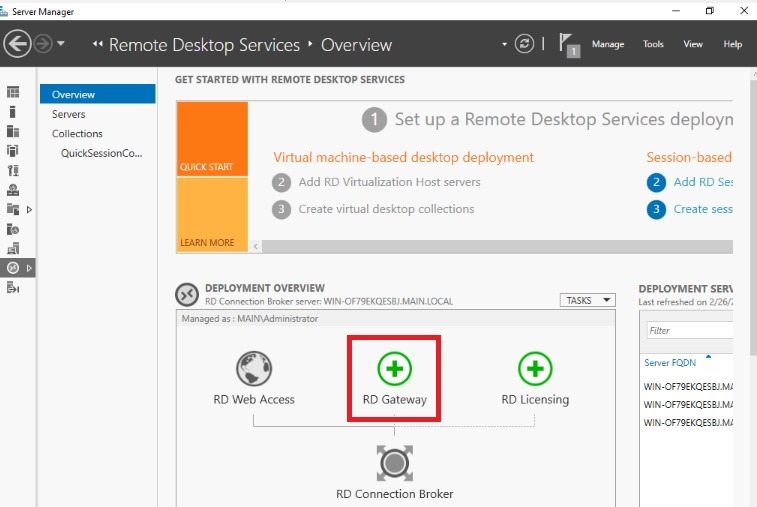
Step 8. Click “RD gateway”.


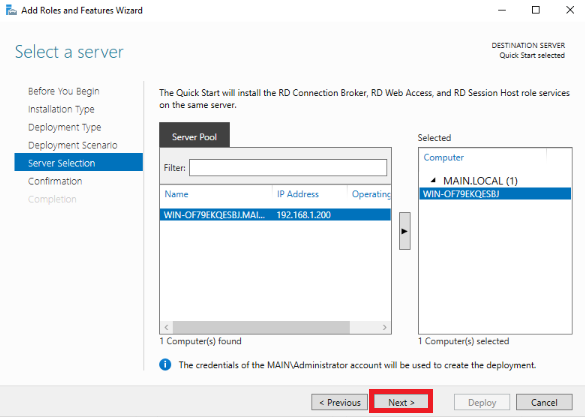
Step 9. Add your server by clicking the arrow and after clicking “next”.


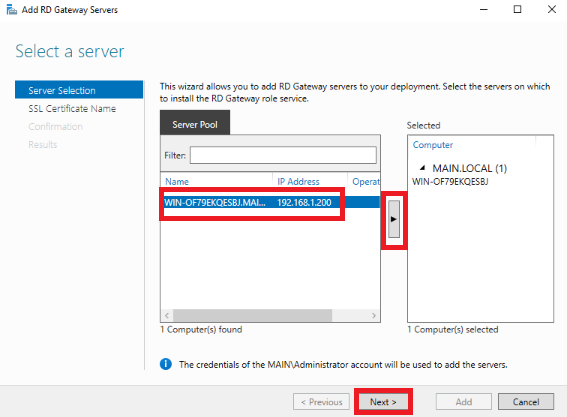
Step 10. Type your computer name with the domain name.


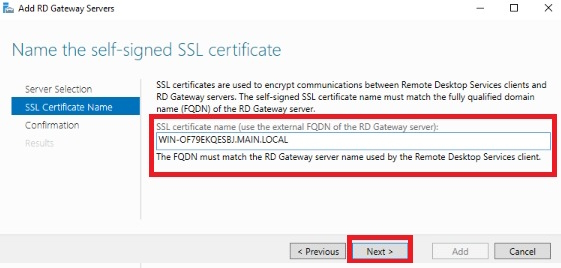
Step 11. Click “add”.


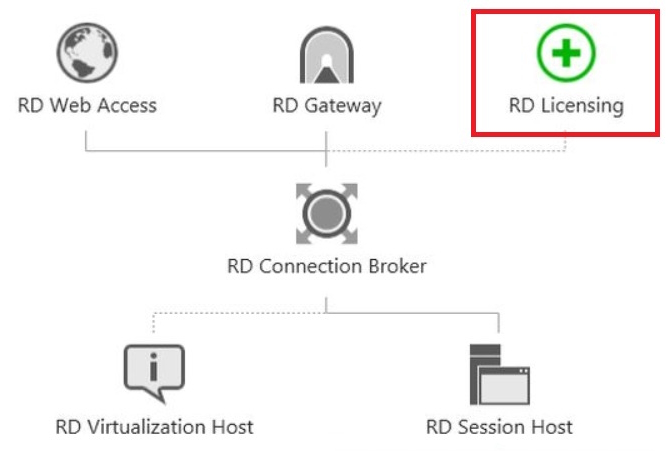
Step 12. After installing the same installing process for “RD licensing”.


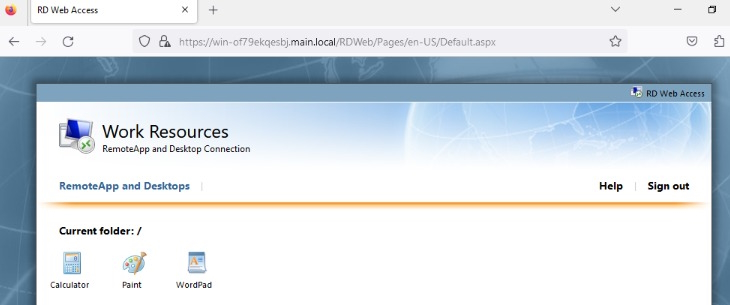
Step 13. After installation, open your web browser from the client's computer, and type your computer name with the server’s domain name after continuously typing/rdweb and hit enter then give your server’s user's name with the domain name and password.


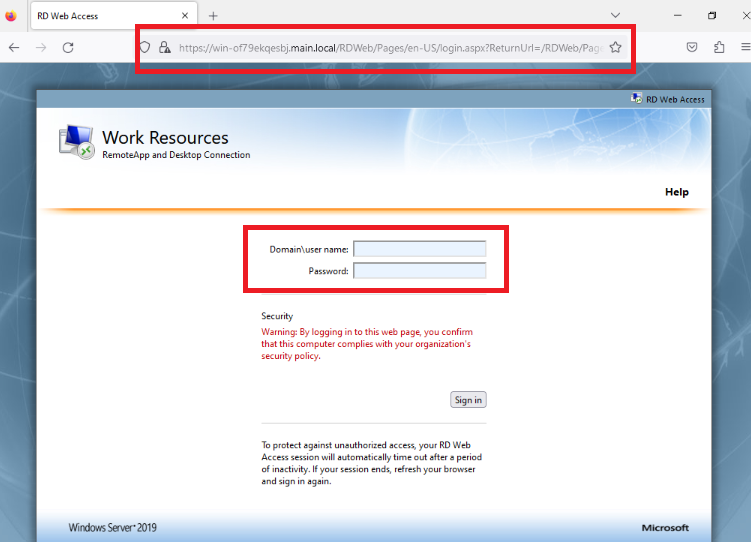
Note. Now you can see our remote app and desktop works successfully.


Conclusion
In this article, we all clearly understand how to install and configure a website remote desktop on Windows Server 2019 in the proper method and easiest way. If there is clarification regarding this topic, feel free to contact me.


About HostForLIFE.eu

HostForLIFE.eu is European Windows Hosting Provider which focuses on Windows Platform only. We deliver on-demand hosting solutions including Shared hosting, Reseller Hosting, Cloud Hosting, Dedicated Servers, and IT as a Service for companies of all sizes.

We have offered the latest Windows 2016 Hosting, ASP.NET Core 2.2.1 Hosting, ASP.NET MVC 6 Hosting and SQL 2017 Hosting.


Tag cloud

Sign in