Hey folks, now it’s possible to manage your IIS (Internet Information Services) Server right from the Browser. I am going to share the steps , which I was required to perform before it started running. It was simple though. Right now, the Service is in “Preview” mode, hope to see this launched very soon!
“To start, head over to https://manage.iis.net and download IIS Administration Setup.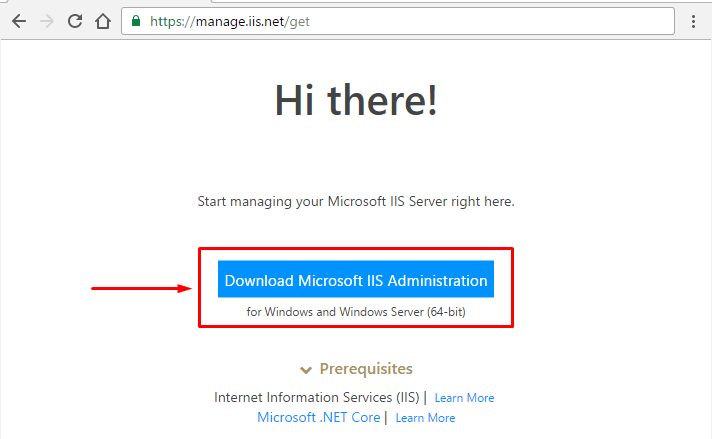
As soon the download starts, it shows you another screen waiting for the Service to be installed and run and let you proceed further.

The installation failed twice. It asked me to install “Microsoft Visual C++ 2015 Redistributable (x64)” first and then asked to install “Microsoft .NET Core 1.0.1 Windows Server Hosting”. I had no other trouble during the installation. My machine config at the time is Windows 10 Enterprise (x64) / i5 / 12 GB. I did an IIS reset and the waiting Window started receiving signals. The first screen prompted me with a default port (PORT# 55539) on the localhost address and asked me to supply an “Access Token”.
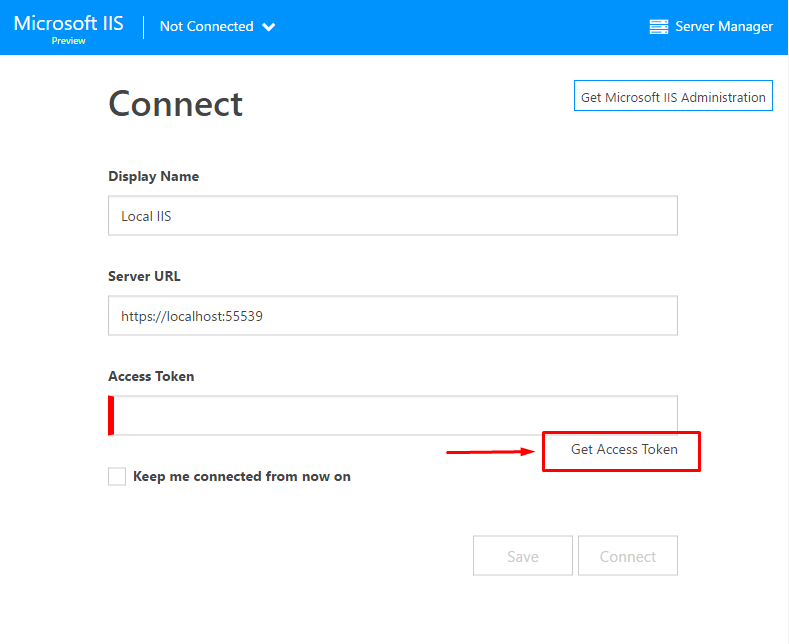
The link, given below in the input box lets you generate or refresh the access token. In the background, it installed “Microsoft IIS Administation Service” exposing a Web Service on port 55539. I’ve yet to figure out, if the port is configurable or not.
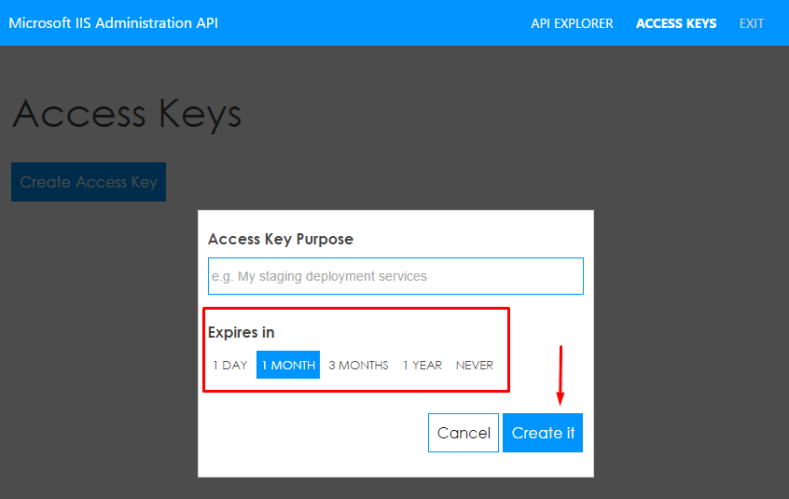
Generate an access token and supply to IIS Management form and you are done. It also allows you to set how soon the access token should be expired.

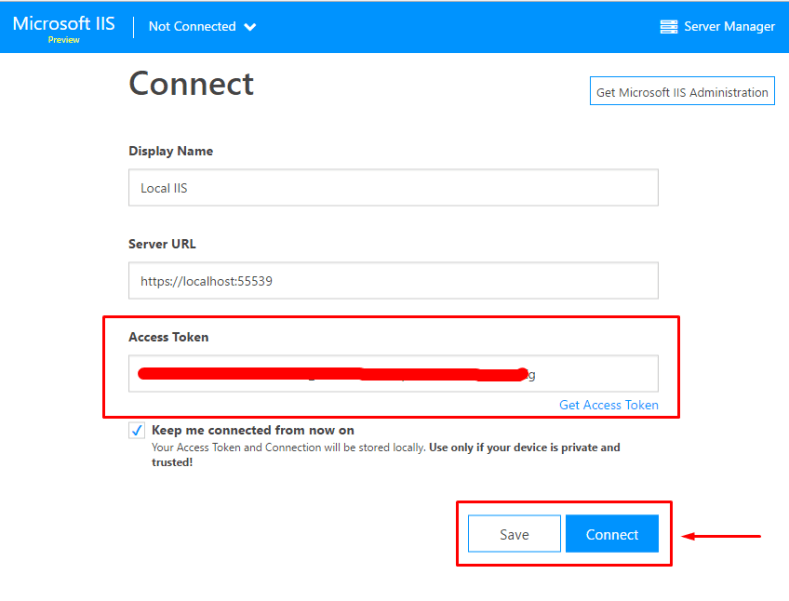
IIS Administration Setup needs to be installed on the machine running IIS Server. To manage any IIS Server online, you just need the Access Token.
The steps are given below.
- Install IIS Administration Setup and its dependencies on IIS Server machine. (It will install and start “Microsoft IIS Admistration” Service).
- Generate Access Token on the machine.
- Use the token any where in the world to access IIS Server, which belongs to the token. Make sure the port 55539 is allowed from the network, which you’re trying to access the IIS Server over the Web.
You can refresh the key anytime, which you want to (or an access token has been compromised).
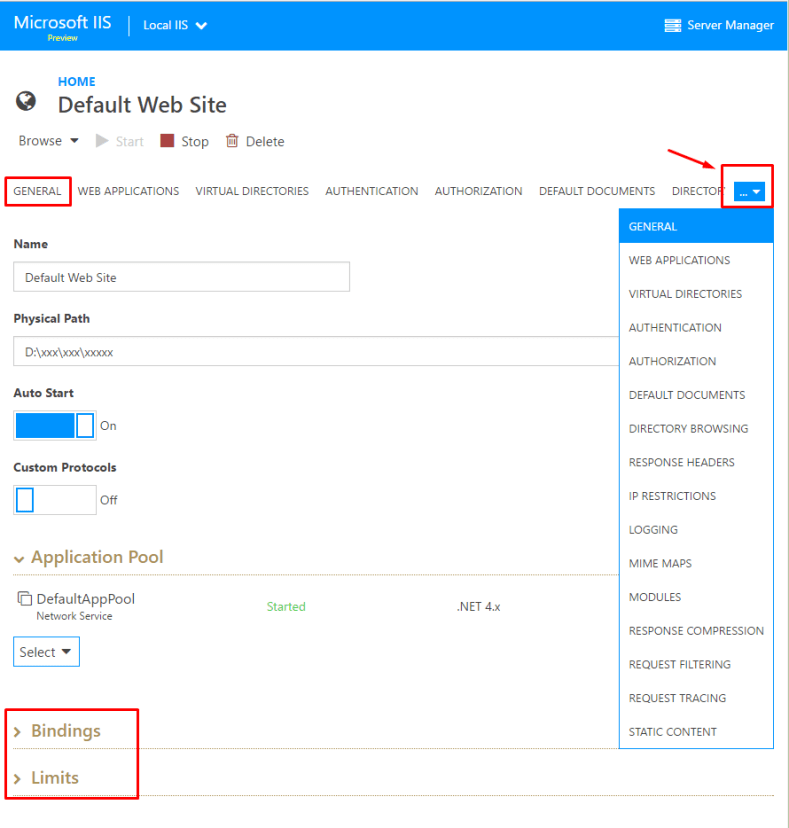
Server and Website Administration is very smooth with the Web console. All the options from IIS Manager are available online and are very user friendly. You can do pretty much everything from the Web console, which comes available with IIS Manager on Windows.
Exploring websites
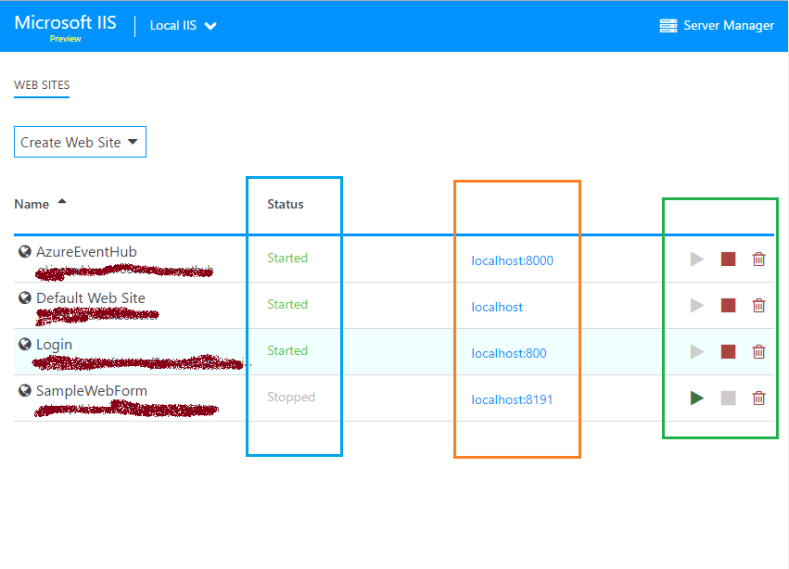
Create a Website.


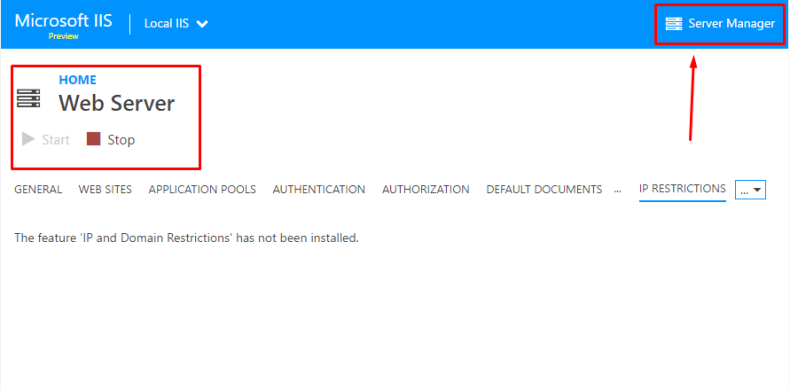
Managing IIS Server
I’ll leave the rest of the exploration for you. Hope, you enjoyed it. Thanks for reading.