We are going to discuss how to host and publish .NET Core 6 Web API on IIS Server

Basically, Internet Information Service (IIS) is the flexible and general-purpose web server provided by Microsoft that will be run on Windows and used to serve requested files.
Required Tools
IIS Manager
.NET Core SDK 6
Visual Studio 2022
Let’s start,
Step 1
Create a new .NET Core Web API Project
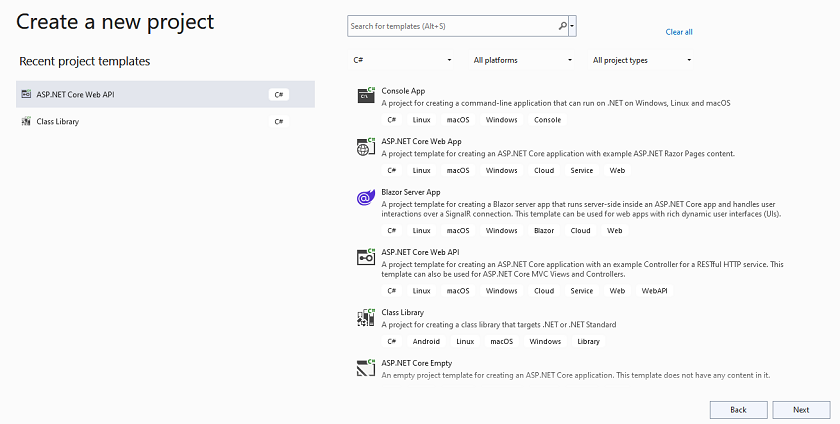
Step 2
Configure your new project
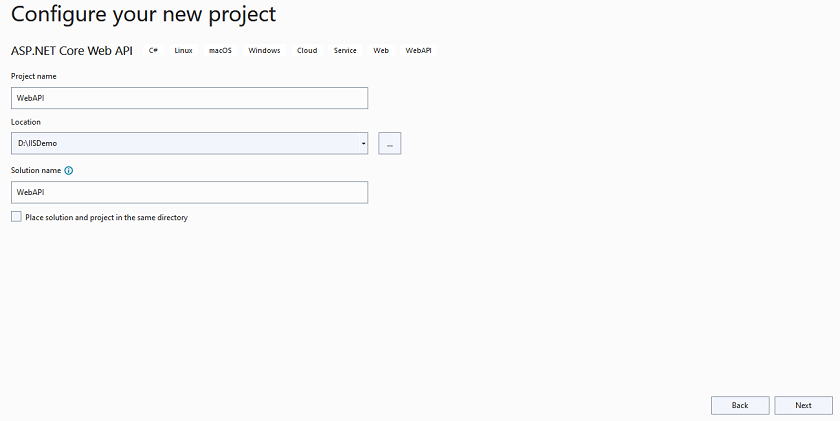
Step 3
Provide additional information like .NET Framework Version, Open API, and HTTPS
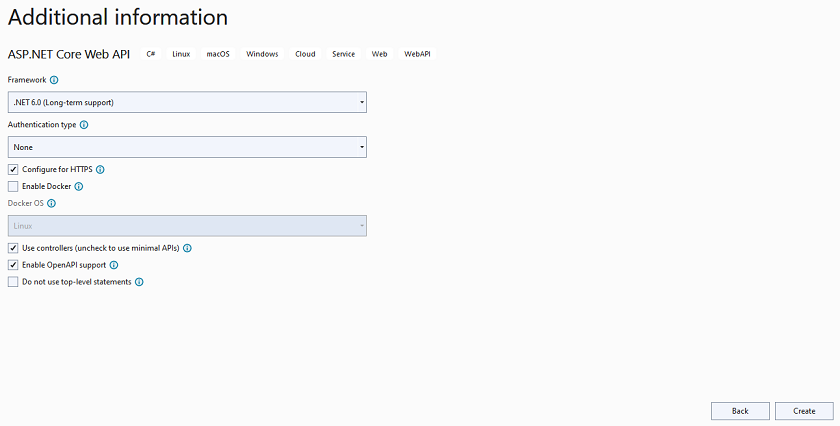
Step 4
Project Structure
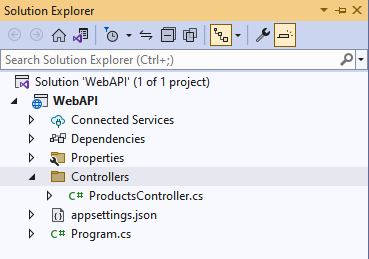
Step 5
Create the Product Controller and add one endpoint inside that class and also check other files which are created by default
using Microsoft.AspNetCore.Mvc;
namespace WebAPI.Controllers {
[Route("api/[controller]")]
[ApiController]
public class ProductsController: ControllerBase {
[HttpGet]
[Route("list")]
public IDictionary < int, string > Get() {
IDictionary < int, string > list = new Dictionary < int, string > ();
list.Add(1, "IPhone");
list.Add(2, "Laptop");
list.Add(3, "Samsung TV");
return list;
}
}
}
Program.cs file
var builder = WebApplication.CreateBuilder(args);
// Add services to the container.
builder.Services.AddControllers();
// Learn more about configuring Swagger/OpenAPI at https://aka.ms/aspnetcore/swashbuckle
builder.Services.AddEndpointsApiExplorer();
builder.Services.AddSwaggerGen();
var app = builder.Build();
// Configure the HTTP request pipeline.
if (app.Environment.IsDevelopment() || app.Environment.IsProduction()) {
app.UseSwagger();
app.UseSwaggerUI();
}
app.UseHttpsRedirection();
app.UseAuthorization();
app.MapControllers();
app.Run();
Here also you can see we configure the HTTP request pipeline for both Development and Production Environment.
WebAPI.csproj file
<Project Sdk="Microsoft.NET.Sdk.Web">
<PropertyGroup>
<TargetFramework>net6.0</TargetFramework>
<Nullable>enable</Nullable>
<ImplicitUsings>enable</ImplicitUsings>
</PropertyGroup>
<ItemGroup>
<PackageReference Include="Swashbuckle.AspNetCore" Version="6.2.3" />
</ItemGroup>
</Project>
launchSetting.json file
{
"$schema": "https://json.schemastore.org/launchsettings.json",
"iisSettings": {
"windowsAuthentication": false,
"anonymousAuthentication": true,
"iisExpress": {
"applicationUrl": "http://localhost:11254",
"sslPort": 44315
}
},
"profiles": {
"WebAPI": {
"commandName": "Project",
"dotnetRunMessages": true,
"launchBrowser": true,
"launchUrl": "swagger",
"applicationUrl": "https://localhost:7047;http://localhost:5047",
"environmentVariables": {
"ASPNETCORE_ENVIRONMENT": "Development"
}
},
"IIS Express": {
"commandName": "IISExpress",
"launchBrowser": true,
"launchUrl": "swagger",
"environmentVariables": {
"ASPNETCORE_ENVIRONMENT": "Development"
}
}
}
}
Step 6
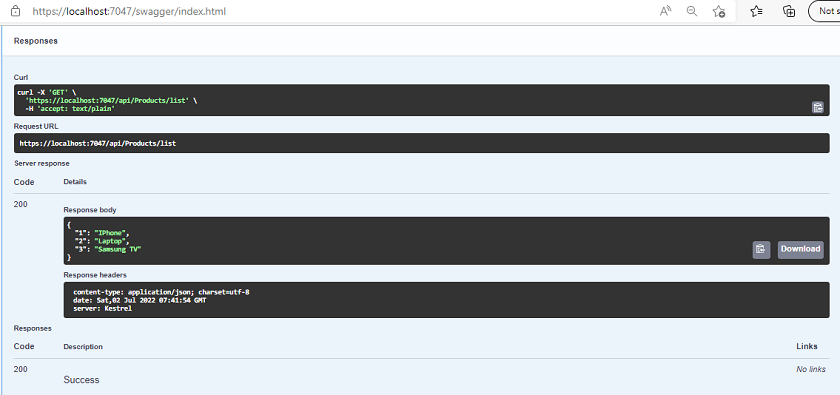
Run your application and use hit the API endpoint using swagger UI
Step 7
Check your all IIS Services are running on your system properly or not. If not then open the control panel and go to the program and features and click on Turn Windows Feature on or off

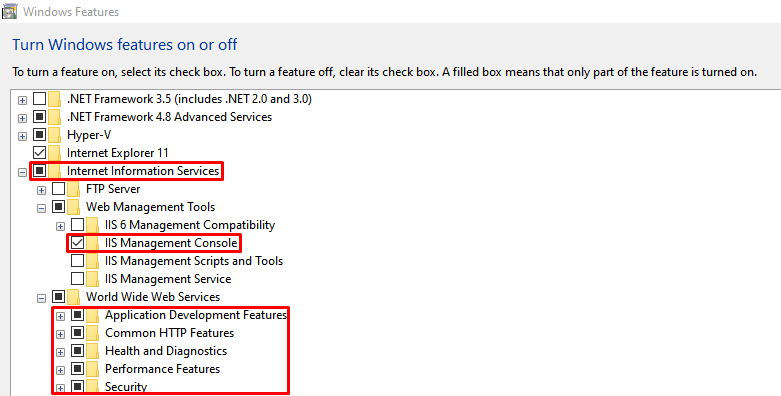
Apply the changes as I showed you in the above image and click on apply and then restart your computer
Step 8
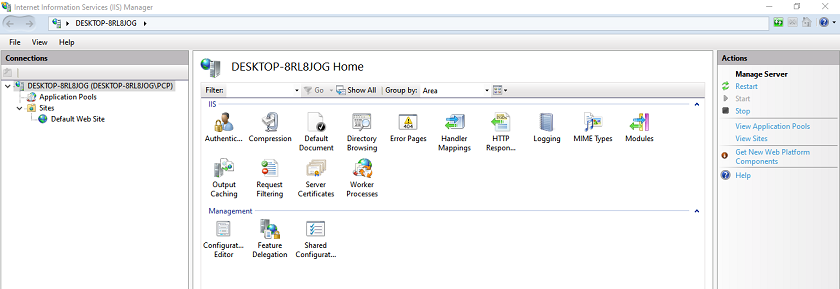
After restarting your computer will see IIS Manager in the search box and open it.
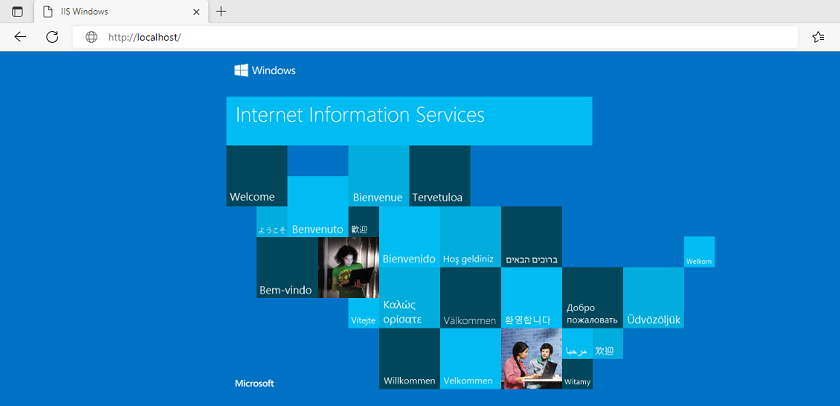
Now, check your running IIS using localhost in the browser
Step 9
Install ASP.NET Core 6.9 Runtime – Windows Hosting Bundle Installer
Step 10
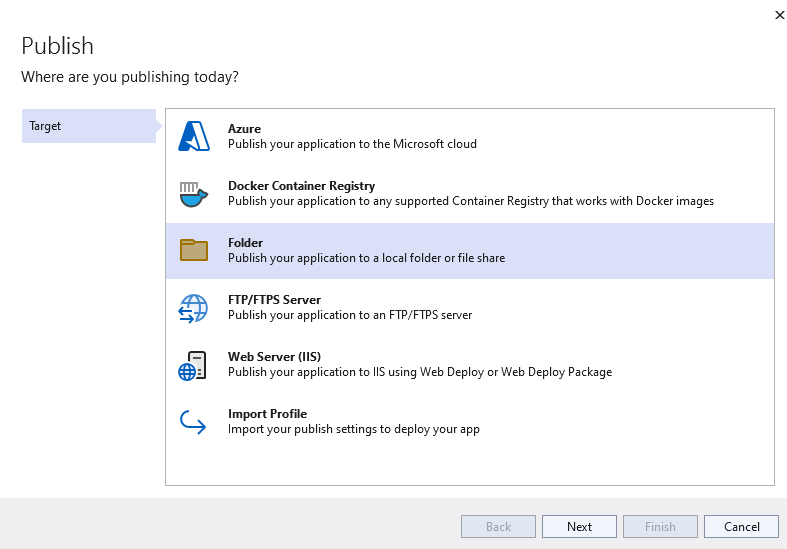
Now, we are going to publish our application for that, right-click on WebAPI Project and click on publish
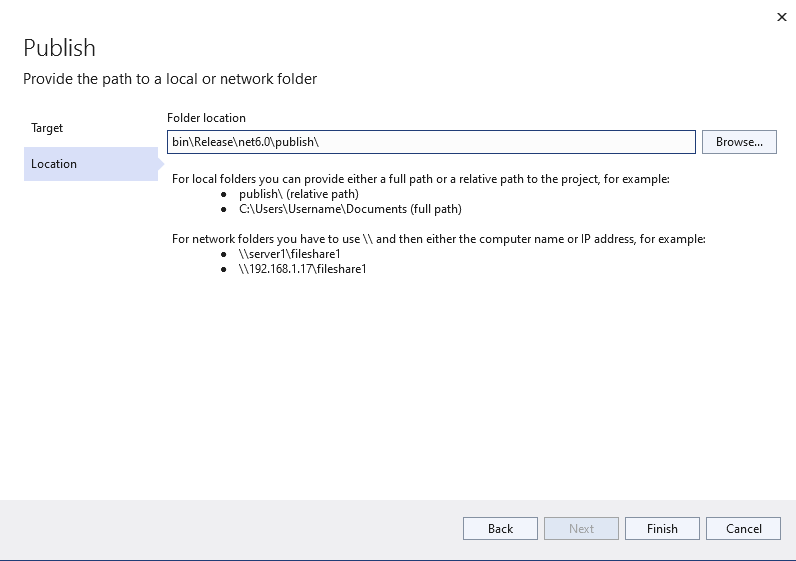
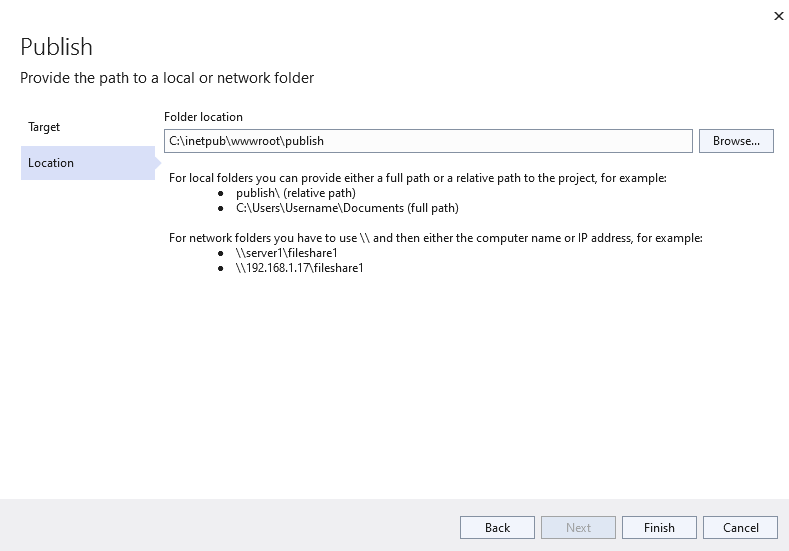
As you see it will take the default path, so change that path to c:\inetpub\wwwroot\publish after creating publish folder over there
Step 11
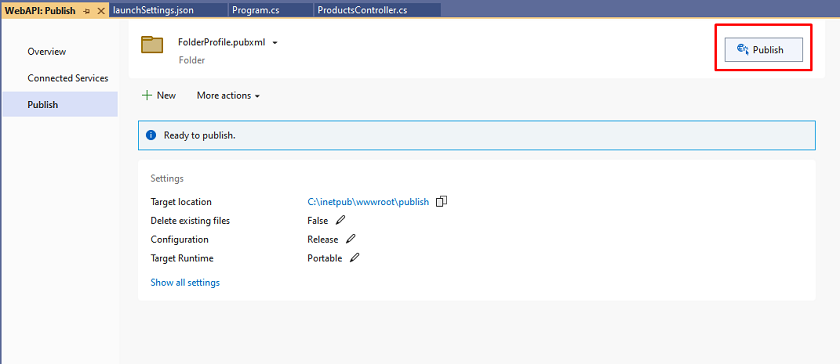
Here you can see all the configurations related to publishing like path and some environmental variables and later on click on publish
Step 12
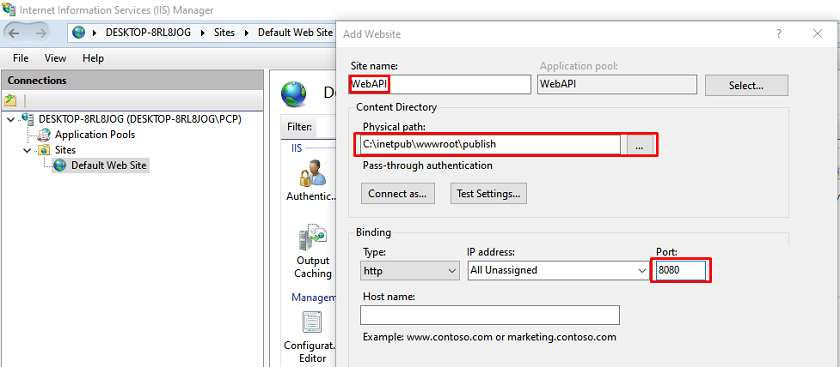
Open IIS Manager and create a new Web Application after right click on the sites
Step 13
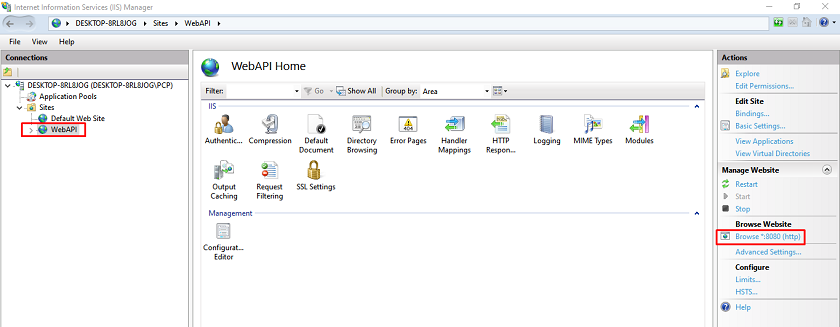
Click on Web API and on the right side you can see the browse option so click on that and open the application inside the browser
Step 14
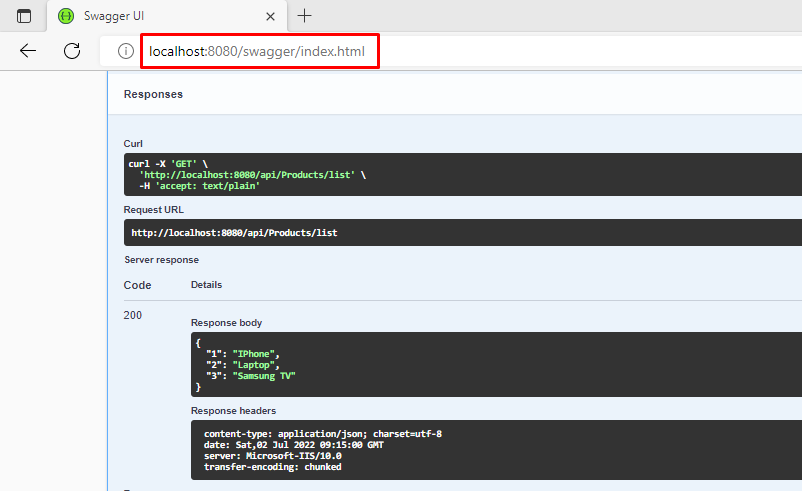
In the browser when you hit the Web API endpoint using Swagger then will see the following list of products as an output
In this article, we discussed .NET Core 6 Web API hosting and publish related things using IIS and things related to that step-by-step. I hope you understand all things.
Happy Coding!