IIS 7.5 and IIS 8.0 European Hosting

BLOG about IIS 7.5 Hosting, IIS 8.0 Hosting and Its Technology - Dedicated to European Windows Hosting Customer

IIS Hosting Europe - HostForLIFE :: Look at Logging in IIS 7 and IIS 7.5

clock January 27, 2023 07:11 by author Peter

In this article, we will look into the built-in logging features of IIS 7 and 7.5 to log request details. An IIS log is a useful resource to troubleshoot requests. In IIS 7 and 7.5, we can log the details of a request, such as client IP, time taken, response size, cookie and so on into a file. This information helps to find the load on the server in terms of number of requests, size and time taken to serve the request.

Let's open IIS, configure logging for a website and analyze it. We can configure logging at server level or website level. Let's do it at the website level. Go to Default Web Site, go to the Logging feature and click "Enable":

In the following Logging dialog, we can configure the format of the log file, it can be:

  • IIS: IIS log file format is a fixed ASCII text-based format, so you cannot customize it (Can't select fields) and fields are separated by commas.
  • W3C (default format): It is a customizable ASCII text-based format. You can use IIS Manager to select which fields to include in the log file and fields are separated by spaces.
  • NCSA: its log file format is a fixed ASCII text-based format, so you cannot customize it and contains less information than an IIS log format.
  • Custom: ODBC logging is implemented as a custom logging module and helps to log information into ODBC-compliant databases like SQL Server or Microsoft Access.

Select W3C as log format, click on "Select Fields" and choose the fields that need to be logged in the log file.

We can set the location or directory for the log files, set options to create a new log file based on file size, daily or weekly and so on. When we check "Use local time for file naming and rollover" it will use the local server time instead of UTC for log file naming and time for log file rollover. This setting will not affect the time field format of the request logged in the file and uses UTC time format.

Let's may a request to welcome.png present in the Default Web Site and analyze the log file. This log file will be under the path set in the Logging Feature + W3SVC<website identifier>. In my case, it is "C:\inetpub\logs\LogFiles\W3SVC1" and contains the following information:

Most of the fields are self-explanatory and field prefixes have the following meanings:

    s- Server actions
    c- Client actions
    cs- Client-to-server actions
    sc- Server-to-client actions
    sc-bytes - response size
    cs-bytes - request size.

The Time-taken field will show the total time taken to generate the response as well as the time to send the complete response to the client until the last byte. This is done by taking into account the last ACK from the answer to the response. Let's say a request took 5000 milliseconds to generate the response and 3000 milliseconds to send the complete response to the client, so it will show time-taken as 8000 milliseconds.

Most of the preceding logging features are also available on a FTP site as well. In most of the cases, your log file will be very large and can't be analyzed in a notepad. In that scenario, we can use the Log Parser (Available here). Let's install it and open our log file as shown below:

Click on New Query from File Menu and select Log type as IISW3CLOG and hit F5. The result will be as shown below:


We can even write our own queries in SQL syntax to filter the data:
SELECT TOP 10 * FROM '[LOGFILEPATH]' where time-taken >100

As well, there are a few sets of built-in queries for IIS in the Library tab as shown below:


By using the Log Parser Studio, we can analyse large log files to determine load and performance issues at the page or user level. We can use IIS logs as a first step to troubleshoot performance issues. This log helps us to determine any performance issues that exist or not. If any exist then which page is taking time to respond and so on. I will end this article, by mentioning tools helpful in troubleshooting IIS issues in scenarios like a crash, hang, high CPU or memory and so on (we will discuss the following tools in depth in future articles):

    IIS Logging
    IIS Advanced Logging
    FREB Tracing [Failed Request Tracing]
    Fiddler or IE Developer Tools
    Memory dumps collection ofw3wp.exe using Debug Diag or AD Plus.
    Memory dumps analysis using WinDbg tool.

I hope this article will be helpful for all.


IIS Hosting Europe - HostForLIFE :: Create Virtual Directory In IIS

clock January 20, 2023 07:05 by author Peter

In this post I’m going to tell how to create a virtual directory in IIS. Most of the ASP.NET beginners wonder about how to create a virtual directory in IIS. In order to help them, I prepared this post. Before you proceed just check you have installed IIS on your local machine. If not, please check my previous post here,

What is Virtual Directory?
Virtual directory is a mapping between the actual web application files and IIS. That is we map the website files to the IIS in Virtual Directory. If you see in IIS, it looks like a directory but it actually points the exact web application path.

Create Virtual Directory
Here I’m going to create a virtual directory in IIS for the web application which is located in the path:  “G:\DotNetExamples\AllInOne”,

Step 1: Open IIS. To open IIS, press windows key + R key, which opens “Run” window and type “inetmgr” and press enter, which opens the IIS.

Step 2: In IIS, right click on the “Default Web Site” and select the “Add Application” in the float menu.

Step 3: In this “Add Application” window, we need to specify the “Virtual Directory” name and the physical directory where the actual web site files are located. Leave the application pool as it is. Click OK.


Step 4: Now the Virtual Directory has been created under the “Default Web Site”. To test the application right click the virtual directory and choose “Manage Application, then Browse” which will open the application in the respective default browser.

Hope this helps beginners!


IIS Hosting Europe - HostForLIFE :: Deploying A Blazor Application On IIS

clock January 10, 2023 08:07 by author Peter

In this article, we will understand how to deploy an ASP.NET Core hosted Blazor application with the help of IIS 10 on a Windows 10 machine. We will use Visual Studio 2017 to publish the app and SQL Server 2014 to handle DB operations. We will also troubleshoot some of the common hosting issues for a Blazor application.

Prerequisites
Install IIS in your machine
Install URL Rewrite module from here

Please refer to my previous article Cascading DropDownList in Blazor Using EF Core to create the application that we will be deploying in this tutorial.

Installing .NET Core hosting bundle

Since we are going to deploy an ASP.NET Core hosted Blazor application, the first step is to install the .NET Core hosting bundle in our machine.
Follow the below steps to download .NET Core hosting bundle,

Step 1 
Open https://www.microsoft.com/net/download/all

Step 2 
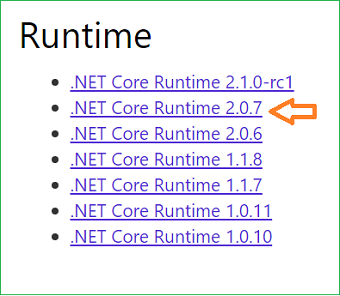
Select the latest non-preview .NET Core runtime from the list. For this tutorial, we will select the .NET Core Runtime 2.0.7.

Refer to the image below, 
Step 3

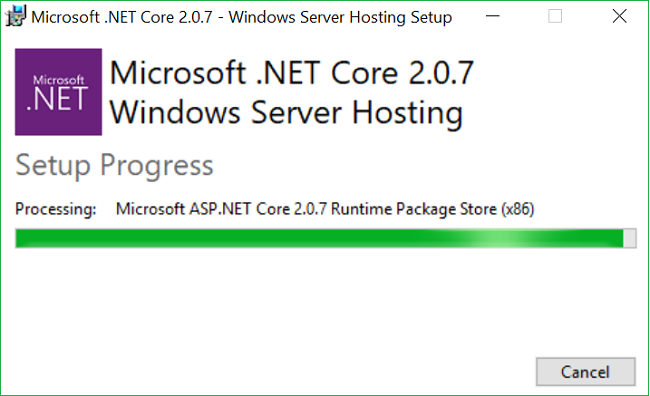
On the .NET Core runtime download page, scroll down to the Windows section, select the “Hosting Bundle Installer” link to download the .NET Core Hosting Bundle. Once the download is finished, double-click to start installing it. You will see a window similar to the one shown below,
Important Note
  1. .NET Core hosting bundle should be installed after installing IIS only. If you install.NET Core hosting bundle before installing IIS then you need to repair it after installing IIS so that it will update its dependencies for IIS.
  2. Restart the machine after installing the .NET Core hosting bundle.
Publishing the Blazor application
Once .NET Core hosting bundle installation is successful and you have restarted your machine, open the Blazor application solution using VS 2017.

Right-click on the Server project of your solution and click publish. In this case, it will be BlazorDDL.Server >> Publish.
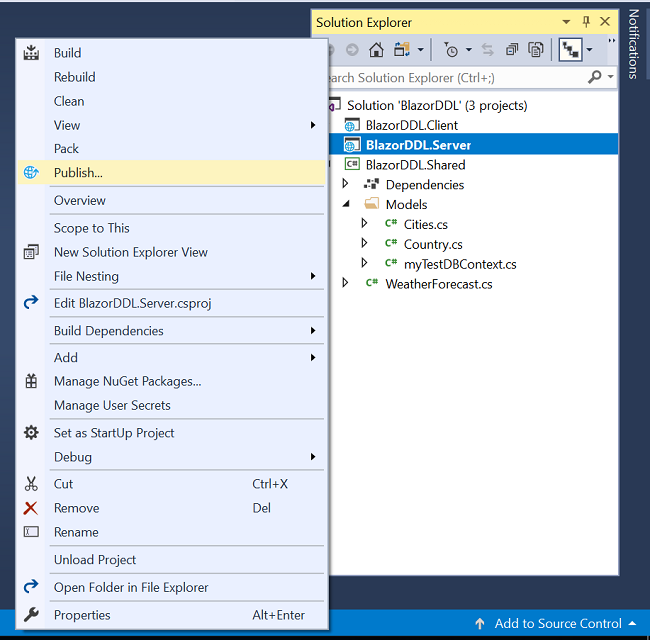
You will see a screen similar to below. Select the folder from the left menu and provide a folder path. You can provide any folder path where you want to publish your app.
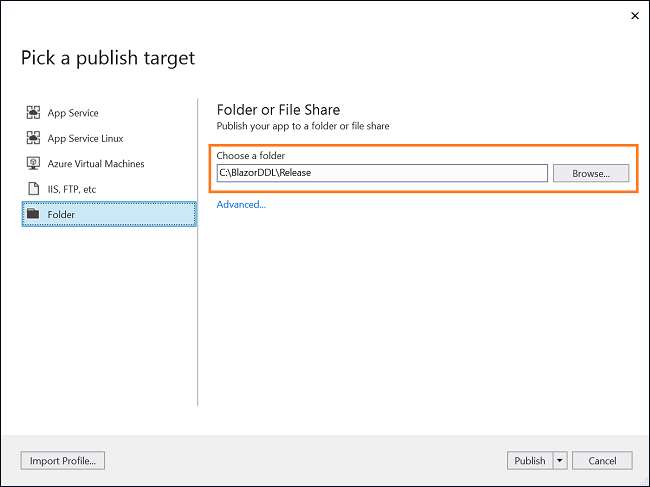
Click on publish. Visual Studio will start publishing your application. If there are no build errors, then your application will be published successfully in the folder you have mentioned. After the publishing is successful, we will move on to configure IIS.

Configuring IIS
Open IIS and right-click on Sites >> Add Web Site.
An “Add Website” pop up box will open. Here we need to furnish details in three fields
  1. Site name: Put any name of your choice. Here I put "ankitsite"
  2. Physical Path: The path to the folder where you have published your application.
  3. Host name: This is the name we put in the browser to access our application. We will put ankitsite.com for this demo.
Click on OK to create the website. Refer to the image below:

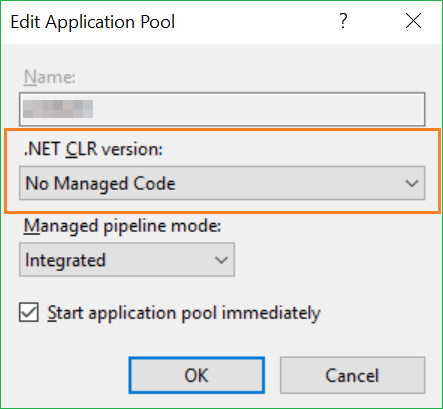
Next step is to configure the “Application Pool” for our site. The application pool name will be the same as the “Site name” we have provided in the last step. Therefore, in this case, the application pool name will be “ankitsite”. Click to “Application Pools” from the left panel and double click on the pool “ankitsite”. It will open an “edit application pool” window. Select “No Managed Code” from the .NET CLR version drop-down. Refer to the image below:
Configuring the DNS host
The last step is to configure our DNS host file.

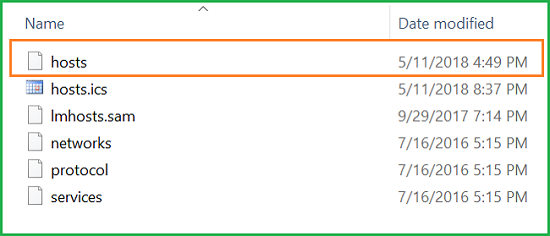
Navigate to C:\Windows\System32\drivers\etc path in your machine and open the “hosts” file using any text editor.

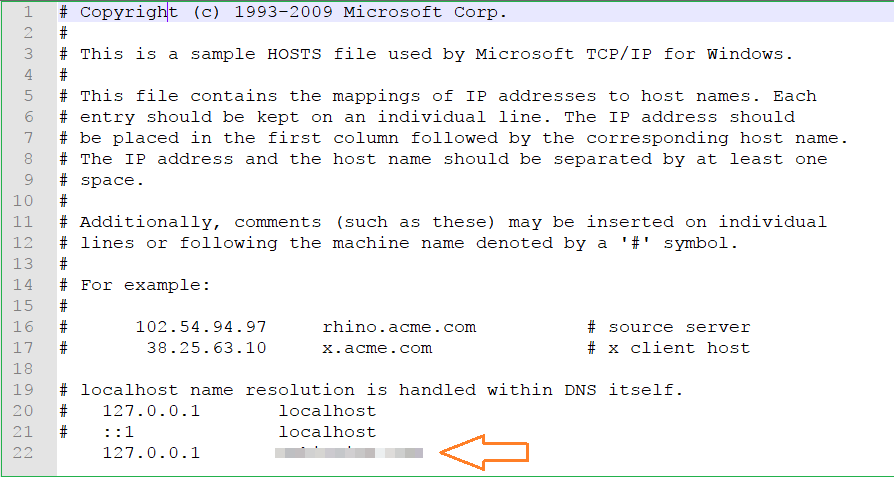
We need to add the hostname that we provided in IIS against the localhost IP address. Refer to the image below,
Hence, we have successfully hosted a Blazor application on IIS.
 
Execution Demo
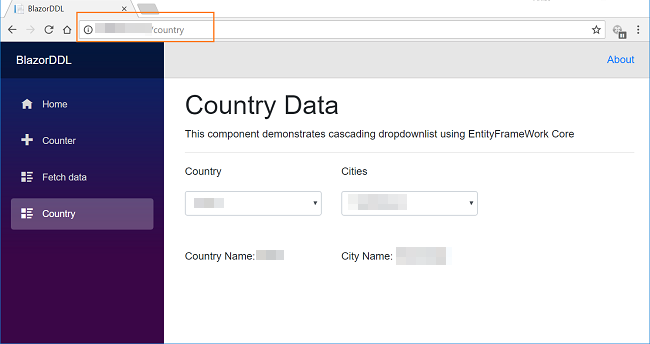
 Open any browser on your machine and enter the hostname you have configured. You can see that the application will open in the browser window.
Troubleshooting common hosting issues
 
In this section, we will look into some of the common problems that you can face while hosting a Blazor application.
  • If you are unable to open the website and get a DNS not found an error
Check if the hostname is configured correctly in the host file. Make sure that your machine is not connected to any VPN server. Also, if you are using any Web proxy then disable it.
  • HTTP Error 500.19 – Internal Server Error - The requested page cannot be accessed because the related configuration data for the page is invalid. 
This error message is clear. The publish folder is inaccessible because of insufficient permissions. Grant Read permission to the IIS_IUSRS group on the publish folder so that it can access Web.config file.
  • If the website is loading but data is not getting populated and you get a 500 Internal server error 
Make sure that your connection string is in the correct format. The user id that you have specified in your connection string should have db_datareader and db_datawriter permissions. If the issue persists then provide the user with db_owner permission
  • If the data is not getting populated and you get an “operation not allowed” exception 
This issue generally appears when you try to do a PUT, POST or DELETE operation in your web API. To mitigate this issue we need to alter the IIS setup configuration.
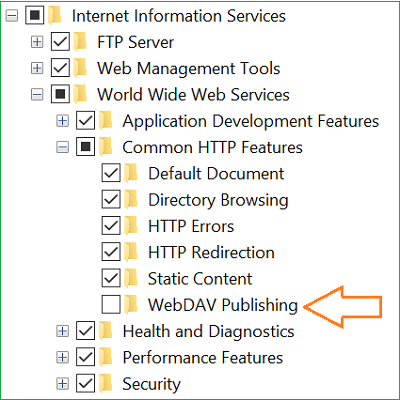
Navigate to Control Panel >> Turn Windows feature on or off. Then navigate to Internet Information Services >> World Wide Web Services >> Common HTTP Features and uncheck the “WebDAV Publishing” option and click ok. Refer to the image below,
 

  • “Failed to load <web API> : No 'Access-Control-Allow-Origin' header is present on the requested resource.
The cause of this error is that the client and the server of the application are not on the same port. The browser will restrict the application to make web API calls due to same-origin policy. To resolve this issue you need to enable Cross-Origin Requests (CORS) in your application. 
  • If you republish the application then do not forget to refresh your website as well as the application pool in IIS. 

Conclusion

 
In this article, we learned how to deploy a Blazor application on IIS in windows machine. We also learned how to resolve some of the common hosting issues while deploying a Blazor application.


About HostForLIFE.eu

HostForLIFE.eu is European Windows Hosting Provider which focuses on Windows Platform only. We deliver on-demand hosting solutions including Shared hosting, Reseller Hosting, Cloud Hosting, Dedicated Servers, and IT as a Service for companies of all sizes.

We have offered the latest Windows 2016 Hosting, ASP.NET Core 2.2.1 Hosting, ASP.NET MVC 6 Hosting and SQL 2017 Hosting.


Tag cloud

Sign in