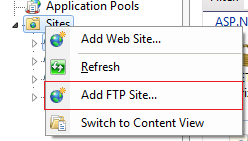
Let's follow the below steps to create an FTP site.

Open IIS manager, click on Sites and then click Add FTP site,
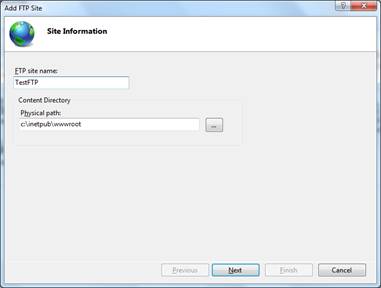
Give a name and specify physical path that has content to be shared, click Next.
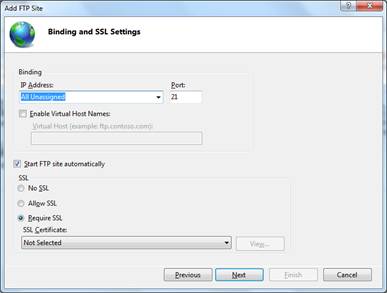
We can specify an IP address and port number on which the FTP site is to be hosted, select No SSL option. Default port for FTP is 21. We can select a SSL certificate, if it needs to be secured. Click Next.
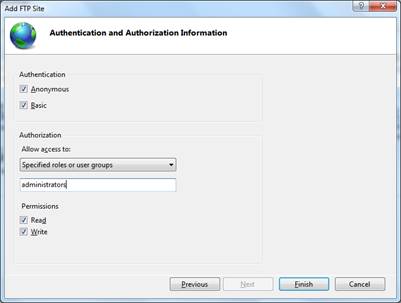
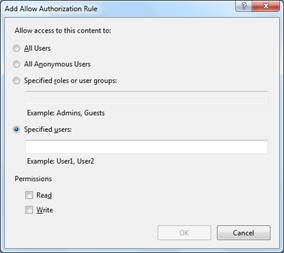
We can specify authentication as anonymous [no authentication needed] or basic [need to supply credentials for accessing FTP]. We can set authorization rules like read-only for anonymous users or read-write for specific users or groups. Click Finish.
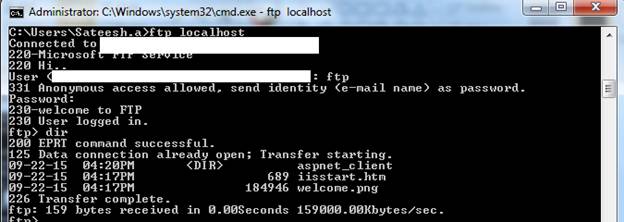
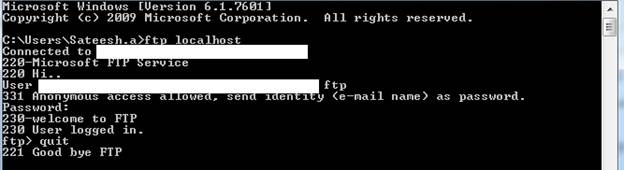
We can browse FTP site using Windows Explorer, IE or command prompt or tools like FileZilla by using path like ftp://<IP/machine name>/. Since we enabled anonymous authentication, we can login by supplying user name as ftp or anonymous and password as any email address as shown below:
Let’s explore other features of FTP under Features pane of IIS Manager.
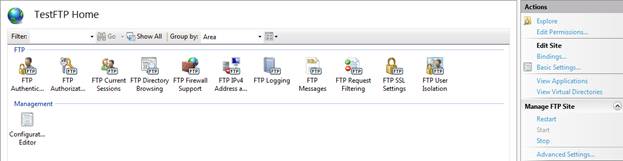
FTP Authentication: We can enable/disable anonymous or basic authentication here.
FTP Authorization Rules: We can add rules to set authorization like read-only for anonymous and read-write for specific users or groups.
FTP Current sessions: It will show details of users connected to FTP currently.

FTP Firewall settings at Server level:
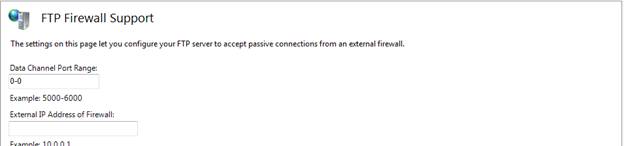
Used to set data channel port number and Firewall IP Address. In general, FTP uses two ports. One is for control channel to send commands [default is 21] and other is for data channel [which can be specified here as a range and same need to be opened on Firewall as well] for sending data like file content.
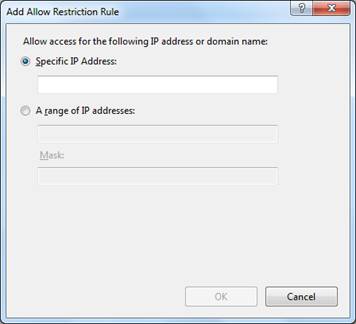
FTP IPv4 Address and Domain Restrictions: Used to restrict\ allow specific IP address for accessing FTP site,
FTP Logging: It is similar to IIS logs, logs information like port number, status code, etc and used for troubleshooting.
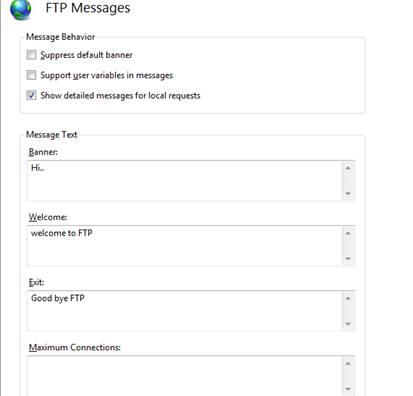
FTP Messages: Used to set welcome and exit messages for FTP Users.
FTP Request Filtering: Used to restrict specify file extensions, URLs or commands.
FTP SSL Settings: Used to set SSL and select SSL certificate for secure FTP.
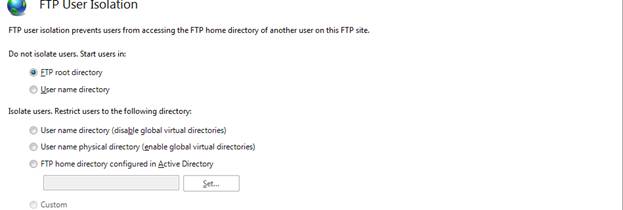
FTP User Isolation: Used to isolate users from accessing other user’s FTP site or home directory.
We can use appcmd.exe tool to create FTP site and set attributes like SSL or authentication using this tool.

Troubleshooting Tips:
If you are unable to create FTP site, ensure that FTP service is up and running under Windows services.
If you are getting any authentication problem, ensure that login/anonymous users have sufficient permissions like read or write on physical files.
We can troubleshoot FTP issues using tools Wireshark and process Monitor.
Ensure port 21 is opened on Firewall for FTP communication.
I am ending things here, I hope this article will be helpful for all.