
December 8, 2023 06:34 by
 Peter
PeterI'll walk you through the process of making a self-signed certificate using IIS version 10 in this article.

Describe SSL
The Secure Socket Layer is the Full Form of SSL.
We can protect your customers' data from online thieves using SSL protocol on your website. For instance, an SSL certificate is necessary to secure client data on e-commerce or banking websites that store credit card information.
I hope you now have a basic grasp. Let's use IIS 10 to build a self-signed certificate.
Construct a Self-Signed Certification
Please use IIS to create a self-signed certificate by following the instructions below.
Create a Self-Signed Certificate
Please follow the below steps to create a Self-Signed Certificate using IIS.
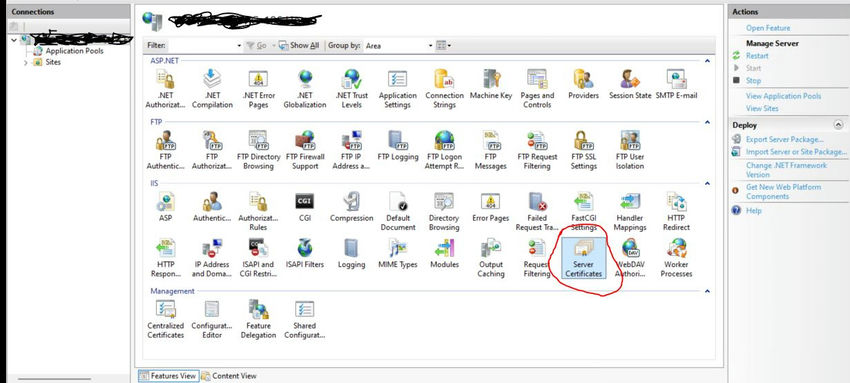
Step 1. Go to the Start menu and click on Administrative Tools -> Internet Information Services (IIS) Manager.
Or
Click “inetmgr” in the search bar to open IIS.

2. Select the Internet Information Service (IIS) Manager by clicking on it. Choose the "Server Certificates" option by clicking the name of the server.
Step 3: Press the Server Certificate button. From the menu on the right, choose "Create Self-Signed Certificate."
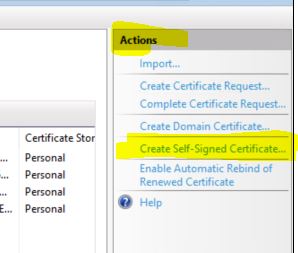
"Create Self-Signed certification" should be clicked.
Step 4: Name the folder and provide a "Friendly Name" for the certificate's storage.
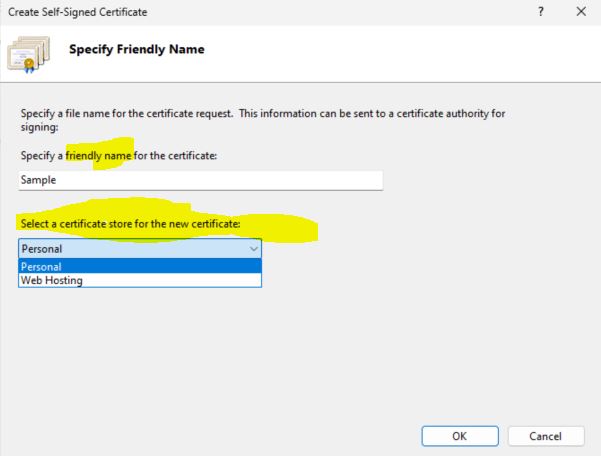
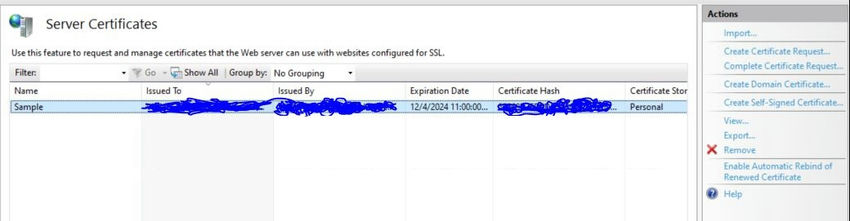
I selected the “Personal” folder and clicked on the Ok button. A self-Signed certificate will be created.
I'll walk you through attaching this certificate to your website so that it is HTTPS in the future article. I hope you find this material interesting and useful. I appreciate your time.