IIS 7.5 and IIS 8.0 European Hosting

BLOG about IIS 7.5 Hosting, IIS 8.0 Hosting and Its Technology - Dedicated to European Windows Hosting Customer

IIS 8.0 Hosting Germany - HostForLIFE.eu :: How To Access A Folder With No Default Document

clock October 31, 2015 01:02 by author Rebecca

In this post, I will tell you how to access a folder with no document in IIS. It's easy, just follow these steps:

Step 1

Create a folder called Original--IIS-Files

Step 2

Move all the files into folder Original-IIS-Files

Step 3

Navigate to your web server. By default, the Web Server will render the following message when the folder has no default documents.

And you're done! Simple, right?

HostForLIFE.eu IIS 8.0 Hosting
HostForLIFE.eu is European Windows Hosting Provider which focuses on Windows Platform only. We deliver on-demand hosting solutions including Shared hosting, Reseller Hosting, Cloud Hosting, Dedicated Servers, and IT as a Service for companies of all sizes. We have customers from around the globe, spread across every continent. We serve the hosting needs of the business and professional, government and nonprofit, entertainment and personal use market segments.


IIS 8.0 Hosting France - HostForLIFE.eu :: How to Configure DNS Record for Sub Domain

clock October 16, 2015 11:34 by author Rebecca

In this article, I will tell you how to configure DNS record for sub domain.

Step 1

Open your domain control panel then go to DNS manager.

Step 2

Add following A records for domain.com and www.domain.com which point to IIS server IP address:

domain.com  IN A XXX.XXX.XXX.XXX
www.domain.com  IN A XXX.XXX.XXX.XXX
service.domain.com IN A XXX.XXX.XXX.XXX

First two rows will ensure that whenever user browse domain.com or www.domain.com at that time it will be routed to IIS server and rest will be take care by IIS then it will serve public site. The third row in above is important for next step.

Step 3

Now add following wildcard CNAME record:

*.domain.com  IN CNAME service.domain.com

In above wildcard entry ensure that any sub domain request for domain.com will be routed to server which is pointed by service.domain.com.

In IIS setup, you have to edit website binding to include domain.com and www.domain.com as host header, by this way you can tell IIS that any request from domain.com and www.domain.com will be handled by this particular website. So, whenever user browse domain.com or www.domain.com it is serving public website without any problem.

While in case of sub domain it is showing error that “The connection was reset” this is because IIS does not found host header entry for requested domain in any websites. So, you need to add host header entry in service.domain.com website created in IIS setup because service.domain.com is actual website which is going to serve hosted service application when it is browse from sub domain. Use the following code to add host header entry programmatically in IIS:

private string GetWebSiteId(string serverName, string websiteName)

{

    string result = "-1";


    DirectoryEntry w3svc = new DirectoryEntry(string.Format("IIS://{0}/w3svc", serverName));


    foreach (DirectoryEntry site in w3svc.Children)

    {

        if (site.Properties["ServerComment"] != null)

        {

            if (site.Properties["ServerComment"].Value != null)

            {

                if (string.Compare(site.Properties["ServerComment"].Value.ToString(),

                                        websiteName, true) == 0)

                {

                    result = site.Name;

                    break;

                }

            }

        }

    }


    return result;

}


private void AddHostHeader(string hostHeader, string websiteID)

{

    DirectoryEntry site = new DirectoryEntry("IIS://localhost/w3svc/" + websiteID);

    PropertyValueCollection serverBindings = site.Properties["ServerBindings"];


    serverBindings.Add(hostHeader);


    Object[] newList = new Object[serverBindings.Count];

    serverBindings.CopyTo(newList, 0);


    site.Properties["ServerBindings"].Value = newList;

    site.CommitChanges();

}  


AddHostHeader("127.0.0.1:80:user1.domain.com", GetWebSiteId("localhost", "service.domain.com"));

HostForLIFE.eu IIS 8.0 Hosting
HostForLIFE.eu is European Windows Hosting Provider which focuses on Windows Platform only. We deliver on-demand hosting solutions including Shared hosting, Reseller Hosting, Cloud Hosting, Dedicated Servers, and IT as a Service for companies of all sizes. We have customers from around the globe, spread across every continent. We serve the hosting needs of the business and professional, government and nonprofit, entertainment and personal use market segments.


IIS 8.0 Hosting Ukraine - HostForLIFE.eu :: How to Configure ASP.NET Application on IIS

clock October 13, 2015 12:46 by author Rebecca

In this article, I'm going to explain how to set Windows Authentication to configure ASP.NET application in IIS. To make Windows authorize application you need to make changes in web.config as well as IIS manager.

Configuring Windows Authentication

<system.web>
   <authentication mode="Windows"/>
</system.web>

  1.     Start Internet Information Services (IIS).
  2.     Right-click your application’s virtual directory, and then click Properties.
  3.     Click the Directory Security tab.
  4.     Under Anonymous access and authentication control, click Edit.
  5.     Make sure the Anonymous access check box is not selected and that Integrated Windows authentication is the only selected check box.

If you will put Anonymous check box checked then it will not take windows login Id for the user. e.g. string windowsLogin = Page.User.Identity.Name;

Now, your application will work on windows authentication.

Here is the example code:

protected void Page_Load(object sender, EventArgs e)
{
   try
     {
       //Start:
        if (Session["EmployeeCode"] == null)
          {
             string windowsLogin = Page.User.Identity.Name;
             //Check user is valid or not from data base
            //I am putting simple condition by hard code value
            if (windowsLogin=='ValidUser')
                 {
                   Session["EmployeeCode"] = userId;
                 }
             else
                {
                  Session.Abandon();
                  Response.Redirect("InvalidUser.aspx", false);
                }
         //End
     }
    catch (Exception ex)
    {
       //Handel exception here
       Throw;
     }
}

It's done! You will get user from windows credential and check with existing user with database. If user is valid go ahead other wise navigate the user to Invalid page.

HostForLIFE.eu IIS 8.0 Hosting
HostForLIFE.eu is European Windows Hosting Provider which focuses on Windows Platform only. We deliver on-demand hosting solutions including Shared hosting, Reseller Hosting, Cloud Hosting, Dedicated Servers, and IT as a Service for companies of all sizes. We have customers from around the globe, spread across every continent. We serve the hosting needs of the business and professional, government and nonprofit, entertainment and personal use market segments.


IIS 8.0 Hosting Spain - HostForLIFE.eu :: How to Use ASP.NET to Configure Costum Error Page in IIS

clock September 23, 2015 11:55 by author Rebecca

In this post, we're gonna explain how to use ASP.NET to configure custom error pages in IIS (Internet Information Server).  If we configure .NET Error Pages at the site level, ASP.NET stores the settings in the site’s web.config file. Since these settings are stored in the web.config file they are portable and can be easily moved to another server with the site’s content.

Step 1

Open Internet Information Services (IIS) Manager.  Select your website. Note: This could also be set at the server level and applied to all sites on the server. DoubleClick on the “.NET Error Pages” icon.

The .NET Error Pages features view will be displayed.

Step 2

Click the “Edit Feature Settings” link to enable this feature. The “Edit Error Page Settings” dialog box will appear.

In order to change the default mode, we must also specify a “Default Page”. This page will be used for all status codes that are  not otherwise defined. In this example, we are using a generic custom error page to trap all other errors. Once you enter the absolute URL for the default error page click OK.  It may be a good idea to use a static HTML page here just in case ASP.NET is not functioning properly.
By default server errors are shown when logged on locally to the IIS server and custom errors will only be used from remote sessions. You will want to change this to “On” if you are logged on locally to the IIS server. Otherwise, it will display detailed server errors, and not our custom error pages.

Step 3

Next we will explicitly define the 404 Error code. To get the browser to throw a 404 error, we pointed it to a file on the test site that does not exist. As you can see in the following image the friendly HTTP 404 error page was shown in IE9. A friendly HTTP 404 Error in IE9:

Step 4

On the .NET Error Pages Actions menu click the Add link.

Step 5

The “Add Custom Error Page” dialog will appear. This is where you define individual error pages per status code. For this example, you will add a custom page for the HTTP 404 Error.

Now that you have turned on the feature and added a custom page for the 404 status code, you can verify it is working. To verify visit a page that does not exist. In this example, you will use http://mysite.com/deletedfile.aspx. You can see in the following image that the custom error page was shown.

Step 6

As mentioned above this can also be managed from the site’s web.config file. Consider the following configuration section from our site’s web.config file.

<configuration>
  <system.web>
    <customErrors defaultRedirect=”http://mysite.com/errors/Error.aspx” mode=”RemoteOnly”>
       <error redirect=”http://mysite.com/errors/404.aspx” statusCode=”404″ />
    </customErrors>
  </system.web>
</configuration>

Everything you set in the GUI can easily be set directly in the web.config. This will also allow you to setup .NET Error Pages, if you are on a shared hosting Plan.

HostForLIFE.eu IIS 8.0 Hosting

HostForLIFE.eu is European Windows Hosting Provider which focuses on Windows Platform only. We deliver on-demand hosting solutions including Shared hosting, Reseller Hosting, Cloud Hosting, Dedicated Servers, and IT as a Service for companies of all sizes. We have customers from around the globe, spread across every continent. We serve the hosting needs of the business and professional, government and nonprofit, entertainment and personal use market segments.


IIS 8.0 Hosting Spain - HostForLIFE.eu :: Configuring Self-Signed Certificate

clock September 9, 2015 09:25 by author Rebecca

In this post, we're going to be very basic and straight forward few clicks on how to create an dconfigure self-signed certificate in IIS 7 or later.

Steps here mentioned are based on IIS 8, but it would be almost same on IIS 7 as well.

Step 1

To get started open IIS and select Server Certificates feature.

It will display list of all installed Server Certificate on web server.

Step 2

To create new self-signed certificate, click on Create Self-Signed Certificate in action pane.

It will open dialog box where you can specify friendly name for server certificate and certificate store for newly created SSL certificate.

Just specify name of the certificate, certificate store and click on OK. So, you are half way done, you have created Self-Signed Certificate with IIS, but still half way to go. After creating certificate, you need to bind it with websites then only we will be able to browse local IIS website with HTTPS.

Step 3

To bind websites with this certificate, select website in IIS and right click on it and select Edit Bindings.

It will open Site Bindings dialog where we can see binding information for selected websites. By default you will find one HTTP binding listed here.

Step 4

Click on Add button to Add new binding for selected website.

Step 5

Here, select binding type HTTPS and select newly created SSL certificate from drop down and click on OK. And congrats, you have added HTTPS binding to website which uses self-signed certificate in local IIS. To verify open and browse https://localhost.

Hope this quick post would be helpful!

HostForLIFE.eu IIS 8.0 Hosting
HostForLIFE.eu is European Windows Hosting Provider which focuses on Windows Platform only. We deliver on-demand hosting solutions including Shared hosting, Reseller Hosting, Cloud Hosting, Dedicated Servers, and IT as a Service for companies of all sizes. We have customers from around the globe, spread across every continent. We serve the hosting needs of the business and professional, government and nonprofit, entertainment and personal use market segments.


IIS 8.0 Hosting Portugal - HostForLIFE.eu :: How to Use IIS URL Rewrite Module to Set Preferred Domain

clock September 2, 2015 06:22 by author Rebecca

In this post, we will learn how you can use IIS URL Rewrite extensions to redirect domain.com to www.domain.com. IIS URL Rewrite extensions enables web administrator to enforce powerful rules to transform complex URLs into simple and consistent Web addresses. As well it also helps to produce user and search engine friendly URLs.

As you all know that by default, you can access website with or without WWW. For e.g. browsing hostforlife.eu and www.hsotforlife.eu will open same website. This means there are two different web addresses are available for one website and hence website’s SEO ranking will be distributed between these two addresses. To overcome these SEO ranking distribution, we can force all web traffic to redirect either domain.com or www.domain.com. Google web masters tool also allow web master to set preferred domain for indexing website URLs. So conclusion is that redirecting all web traffic to only one primary domain or canonical domain can improve SEO ranking. Just follow these steps with IIS.

Step 1

Connect to website through IIS manager and click on URL Rewrite icon.

Step 2

In Actions pane click on Add Rules.

Step 3

In Add Rules dialog box click you can find several predefined rule template. Click on canonical domain name template under search engine optimization section.

Step 4

It will open dialog box to select primary domain for website. Choose appropriate options.

Step 5

Press ok. You have done it. Now all your web traffic will be redirected to primary domain you have selected. And you can see added rewrite rule in list pane. But just using predefined rule template is not enough for web administrator. We should also dig into rule settings done by this rule template. For examine settings of created rule select rule in list pane and double click on it or click on Edit Rules link in Action Pane.

Step 6

It will open edit inbound rule window. Scroll down to bottom of window. There you will find Action sections. In action sections, there is one drop down named Action Type. Default value of Action Type is redirect. Expand Action Type drop down to see different actions available for this rule.

Step 7

And below action type drop down there is another drop down Redirect Type. Default value of this is Permanent (301). Expand drop down to see list of available other redirect type.

Setting redirection type Permanent (301) will cause to send HTTP 301 status code and then after it will redirect to primary domain. So search engine can index appropriate URLs.

HostForLIFE.eu IIS 8.0 Hosting
HostForLIFE.eu is European Windows Hosting Provider which focuses on Windows Platform only. We deliver on-demand hosting solutions including Shared hosting, Reseller Hosting, Cloud Hosting, Dedicated Servers, and IT as a Service for companies of all sizes. We have customers from around the globe, spread across every continent. We serve the hosting needs of the business and professional, government and nonprofit, entertainment and personal use market segments.


IIS 8.0 Hosting UK - HostForLIFE.eu :: How to Set Canonization of the URL in IIS using URL Rewrite Module

clock August 4, 2015 08:08 by author Rebecca

When we publish a website on the internet, typically we record more internet domains (.com, .net, etc.) in order to encourage the maximum possibility that users reach our pages. Having a site that responds to different URL, however, it is not indicated by a point of view of SEO, as it involves a fractionation of the total hit among the various possible addresses, and a best practice is to make sure that all these addresses redirigano to a standard domain name. This process, which is called a URL Canonicalization, can be easily implemented in IIS 7 and above.

First, the initial situation will be similar to that in the figure, that is when we have a Site with binding in a number of hosts that will include various domains, even in the versions with and without "www.". If desired, we can add additional ones through the Bindings option.

With such a configuration, IIS responds to calls in each of these domains, but obviously keeping unchanged the address displayed by the browser. To solve this problem, we can use a form called IIS URL Redirect Module, which can automatically download and install via the Web Platform Installer.

The configuration can be done either by using IIS Manager web.config. In the first case, just double click on URL Rewrite, as shown, to open a mask through which to create our rewriting rules.

From www.testredirect.com to testredirect.com

Once you add a new Blank rule, we must first specify which URLs are to be taken into account by the module applying the rule. This type of setup is indicated by regular expression and, in our case, we will use the pattern (. *) To handle all possible URL.

The second step is to indicate, within the group Conditions, the condition for which the rule will have to act. Therefore, we add a new condition to apply to the host component of the URL and check that does not match the canonical (in our example "testredirect.com"), indicating quset'ultimo through a regex ^ testredirect\.com$.

The last step is to specify the action to be taken (section Action), which in particular will be a type Permanent Redirect to the address shown.

The suffix {R: 1} and the Append flag query string make sure that any file names or query string parameters are appended to the new address so generated.

This configuration can also be set from the web.config section system.webServer:

<system.webServer>
    <modules runAllManagedModulesForAllRequests="true" />
      <rewrite>
          <rules>
              <rule name="RedirectRule" stopProcessing="true">
                  <match url="(.*)" />
                  <conditions>
                      <add input="{HTTP_HOST}" pattern="^testredirect\.com"
                            negate="true" />
                  </conditions>
                  <action type="Redirect" url="http://testredirect.com/{R:1}"
                          appendQueryString="false" />
              </rule>
          </rules>
      </rewrite>
</system.webServer>

From testredirect.com to www.testredirect.com

To redirect reverse, simply change the regular expression and the redirect url in the web.config as in the example below:

<system.webServer>
    <modules runAllManagedModulesForAllRequests="true" />
      <rewrite>
          <rules>
              <rule name="RedirectRule" stopProcessing="true">
                  <match url="(.*)" />
                  <conditions>
                      <add input="{HTTP_HOST}" pattern="^www\.testredirect\.com"
                            negate="true" />
                  </conditions>
                  <action type="Redirect" url="http://www.testredirect.com/{R:1}"
                          appendQueryString="false" />
              </rule>
          </rules>
      </rewrite>
</system.webServer>

Since our rule applies to all the different hosts by canon law, the redirect will be performed automatically for all other domain names (eg. Www.testredirect.net) that we recorded between the bindings of IIS Site.

HostForLIFE.eu IIS 8.0 Hosting
HostForLIFE.eu is European Windows Hosting Provider which focuses on Windows Platform only. We deliver on-demand hosting solutions including Shared hosting, Reseller Hosting, Cloud Hosting, Dedicated Servers, and IT as a Service for companies of all sizes. We have customers from around the globe, spread across every continent. We serve the hosting needs of the business and professional, government and nonprofit, entertainment and personal use market segments.


IIS 8.0 Hosting Romania - HostForLIFE.eu :: How to Prevent Remote Linking Image using URL Rewrite Module

clock July 1, 2015 05:51 by author Rebecca

When a website is particularly popular, it is possible that its contents, for example images, videos and so on in your site, are shown on another website beacuse most of people took those files and linked it to their site. Perhaps without any authorization and permission, you didn't realize about it. In the end, the result is the files will appear on sites that do not belong to us. Maybe this condition is annoying, it will enlarge your expense (bandwidth) of your site. But don't worry, you can have some return in terms of visibility or impressions of the ads especially images and videos that you have in your pages.

Fortunately, using URL Rewrite Module for IIS 7 or above is pretty straightforward to create a rule to handle this problem. All you have to do, once installed, you have to include this section in the web.config:

<system.webServer>
  <modules runAllManagedModulesForAllRequests="true" />
  <rewrite>
    <rules>
      <rule name="Avoid remote linking" enabled="true" stopProcessing="true">
        <match url="(.*)" />
        <conditions>
          <add input="{REQUEST_FILENAME}" matchType="IsFile" />
          <add input="{REQUEST_FILENAME}" pattern="\.(png|jpg)" />
          <add input="{REQUEST_FILENAME}" pattern="blocked\.png" negate="true" />
          <add input="{HTTP_REFERER}" pattern="^http://www\.testredirect\.com/.*$" negate="true" />
        </conditions>
        <action type="Rewrite" url="/blocked.png" appendQueryString="false" />
      </rule>
    </rules>
  </rewrite>
</system.webServer>

As you can see, You can apply the node condition to all requests for files whose extensions are png or jpg (of course you can customize this setting at will). The last condition, in particular, allows you to see through the value of the variable HTTP_REFERER server, if the request was originated by a page that belongs to us or not. If not, the action is designated to perform a rewrite the URL to be processed, by sending the contents of a special image that you have provided (in your case, blocked.png) in a place that originally requested.

HostForLIFE.eu IIS 8.0 Hosting
HostForLIFE.eu is European Windows Hosting Provider which focuses on Windows Platform only. We deliver on-demand hosting solutions including Shared hosting, Reseller Hosting, Cloud Hosting, Dedicated Servers, and IT as a Service for companies of all sizes. We have customers from around the globe, spread across every continent. We serve the hosting needs of the business and professional, government and nonprofit, entertainment and personal use market segments.


IIS 8.0 with Free ASP.NET Hosting - HostForLIFE.eu :: How to Use IISNode to Run Node.js Application Under IIS

clock June 24, 2015 06:06 by author Rebecca

In this post, you will see how to install and run Node.js in IIS with IISNode.

Installing Node.js

Firstly, you need to install Node.js engine on server which can be download from http://www.nodejs.org/#download. Installing Node.js engine will enable us to run node.js application on windows server. But still you have to require configuring IIS so it can route .js requests to the Node.js engine. This can be easily done with the help of IISNode module for IIS 7.x. Once you install IISNode module, you can configure web.config file to route .js or particular file to iisnode module. IISNode module can be downloaded from https://github.com/tjanczuk/iisnode/archives/master once you install iisnode, you will able to find IISNode module in IIS Manager under modules.

Get IIS Ready to Run Node.Js Application

IISNode will also install sample application to get started with Node.js. Sample application is copied within IISNode installation directory. If you installed iisnode with default settings, then sample can be found in C:\Program Files\iisnode\www directory. To run this sample application, create new application within default website for e.g. let say nodejsapp which points to sample application directory mentioned above. Now go to http://localhost/nodejsapp/ and you should able to see different sample link on your browser:

Now let examine HelloWorld sample. Go to http://localhost/nodejsapp/helloworld/hello.js to run server side JavaScript with the help of node.js engine.

It looks there are some issue with application pool write permission. There are two temporary workaround to deal with this permission issue. One is disable logging by adding following key in web.config. Another one is create one application pool with identity as LocalSystem and assign that application pool to the nodejsapp application. If you run into a 503 status code with IIS reporting error code 0x5 (ERROR_ACCESS_DENIED), make sure the identity of the application pool running the site that hosts your node.js application has read & execute rights to node.exe on disk. If you are using the default IIS configuration (DefaultAppPool running under ApplicationPoolIdentity), you can set appropriate ACLs on the node.exe by running:

icacls %systemdrive%\node\node.exe /grant IIS_IUSRS:rx

Now you should able to run Node.js sample shipped with IISNode.

IIS 8.0 with Free ASP.NET Hosting
Try our IIS 8.0 with Free ASP.NET Hosting today and your account will be setup soon! You can also take advantage of our Windows & ASP.NET Hosting support with Unlimited Domain, Unlimited Bandwidth, Unlimited Disk Space, etc.


IIS 8.0 with Free ASP.NET Hosting - HostForLIFE.eu :: How to Secure PHP with php.ini on IIS

clock June 16, 2015 07:23 by author Rebecca

This tutorial will guide you through protecting your server from malicious PHP scripts and also allows you to run multiple sites with different configurations which is imperative in a multiple domain environment for security reasons. To complete this tutorial, you must have working installation of IIS with PHP installed and at least 2 websites.

1. Setting up a php.ini file

Step 1

PHP arrives by default with 2 PHP.ini files. These are overly complex for a new user and ultimately not everything within it is needed. Here, you will use a stripped down version of a php.ini file which I have developed over several years for the “average” setup. Here is a default php.ini file:

; Time Zone
date.timezone = GMT

; Fast CGI fixes for IIS
fastcgi.impersonate=1
cgi.fix_pathinfo=0
cgi.force_redirect=0

; Base directories for htdocs, uploads and sessions
open_basedir = c:\sites\your_website\
;doc_root = c:\sites\your_website\
upload_tmp_dir = c:\sites\your_website\
; Double backslash the session save path. Remember to create the session folder.
; Option only applies when WinCache is not being used
session.save_path = c:\\sites\\sessions\\

; Extension Dir
extension_dir = "./ext/"

; These need disabling for php5.4 as they're deprecated
; You should never need to enable these if your scripts are secure
safe_mode = Off
register_long_arrays = Off
allow_call_time_pass_reference = Off
register_globals = Off

; Logging
log_errors = On
error_log = syslog

; Error Reporting
error_reporting  =  E_ALL & ~E_NOTICE
display_errors = On
display_startup_errors = Off

; Disable functions that could cause a security risk, comma separated
disable_functions = system,shell_exec,exec,escapeshellarg,escapeshellcmd,passthru,proc_ close,proc_ get_ status,proc_ open,proc_terminate

; Memory limits
max_execution_time = 60     ; Maximum execution time of each script, in seconds
max_input_time = 60    ; Maximum amount of time each script may spend parsing request data
;max_input_nesting_level = 64 ; Maximum input variable nesting level
memory_limit = 64M      ; Maximum amount of memory a script may consume (128MB)
post_max_size = 8M

; Sendmail / mail()
SMTP = localhost
smtp_port = 25
;sendmail_from = [email protected]

; File Uploads
file_uploads = On
upload_max_filesize = 100M

; fopen wrappers
allow_url_fopen = On
allow_url_include = On
default_socket_timeout = 10

; Extensions
;extension=php_bz2.dll
extension=php_curl.dll
;extension=php_dba.dll
;extension=php_dbase.dll
;extension=php_exif.dll
;extension=php_fdf.dll
extension=php_gd2.dll
;extension=php_gettext.dll
;extension=php_gmp.dll
;extension=php_ifx.dll
extension=php_imap.dll
;extension=php_interbase.dll
;extension=php_ldap.dll
;extension=php_mbstring.dll
;extension=php_mcrypt.dll
;extension=php_mhash.dll
;extension=php_mime_magic.dll
;extension=php_ming.dll
;extension=php_msql.dll
;extension=php_mssql.dll
extension=php_mysql.dll
;extension=php_mysqli.dll
;extension=php_oci8.dll
extension=php_openssl.dll
;extension=php_pdo.dll
;extension=php_pdo_firebird.dll
;extension=php_pdo_mssql.dll
;extension=php_pdo_mysql.dll
;extension=php_pdo_oci.dll
;extension=php_pdo_oci8.dll
;extension=php_pdo_odbc.dll
;extension=php_pdo_pgsql.dll
;extension=php_pdo_sqlite.dll
;extension=php_pgsql.dll
;extension=php_pspell.dll
;extension=php_shmop.dll
;extension=php_snmp.dll
extension=php_soap.dll
;extension=php_sockets.dll
;extension=php_sqlite.dll
;extension=php_sybase_ct.dll
;extension=php_tidy.dll
;extension=php_xmlrpc.dll
;extension=php_xsl.dll
;extension=php_zip.dll
;extension=php_wincache.dll

; WinCache

; More info http://us2.php.net/manual/en/wincache.configuration.php

; To use these make sure the WinCache DLL is enabled

; Enable WinCache?
; If you disable WinCache be sure to set the session.save_handler to "files"
wincache.fcenabled = 0

; Defines a comma-separated list of IIS web site identifiers where file cache should be enabled or disabled.
wincache.fcenabledfilter =

; Defines the maximum memory size (in megabytes, default 24) that is allocated for the file cache.
; If the total size of all the cached files exceeds the value specified in this setting,
; then most stale files will be removed from the file cache.
wincache.fcachesize = 24

; Enables or disables the file change notification detection functionality.
wincache.fcndetect = 1

; Defines the maximum allowed size (in kilobytes, default 256) for a single file to be cached.
; If a file size exceeds the specified value, the file will not be cached.
; This setting applies to the file cache only.
wincache.maxfilesize = 256

; Enables or disables the opcode cache functionality
wincache.ocenabled = 1

; Defines a comma-separated list of IIS web site identifiers where opcode cache should be enabled or disabled.
wincache.ocenabledfilter =

; Defines the maximum memory size (in megabytes, default 96) that is allocated for the opcode cache.
; If the cached opcode size exceeds the specified value, then most stale opcode will be removed from the cache.
; Note that the opcode cache size must be at least 3 times bigger than file cache size.
; If that is not the case the opcode cache size will be automatically increased.
wincache.ocachesize = 96

; Defines how many files (default 4096) are expected to be cached by the extension, so that appropriate memory size is allocated at the startup time.
wincache.filecount = 4096

; Defines how often (in seconds, default 30) the extension checks for file changes in order to refresh the cache.
; Setting it to 0 will disable the refreshing of the cache.
wincache.chkinterval = 600

; Defines the maximum time to live (in seconds, default 1200) for a cached entry without being used.
; Setting it to 0 will disable the cache scavenger, so the cached entries will never be removed
; from the cache during the lifetime of the IIS worker process.
wincache.ttlmax = 1200

; Defines if caching is enabled when PHP is running in command line (CLI) mode.
wincache.enablecli = 0

; Defines a list of files that should not be cached by the extension.
; The files list is specified by using file names only, separated by the pipe symbol - "|".
; E.g. wincache.ignorelist = "index.php|misc.php|admin.php"
wincache.ignorelist =

; Defines a string that will be used when naming the extension specific objects that are stored in shared memory.
; This is used to avoid conflicts that may be caused if other applications within an IIS worker process tries
; to access shared memory. The length of the namesalt string cannot exceed 8 characters.
wincache.namesalt =

; Enables or disables the user cache functionality.
wincache.ucenabled = 1

; Defines the maximum memory size in megabytes (default 8) that is allocated for the user cache.
wincache.ucachesize = 8

; Defines the maximum memory size in megabytes that is allocated for the session cache.
wincache.scachesize = 8

; Specifies an absolute or a relateve path to the reroute.ini file that contains the list of PHP functions whose
; implementation should be replaced with the WinCache function equivalents.
wincache.rerouteini =

;; ####
;; Don't edit these unless you know what you're doing!
;; ####

; Sessions
; "files" - save to files
; "wincache" - use WinCache
session.save_handler = files
session.use_cookies = 1
session.name = PHPSESSID
session.cache_limiter = nocache
session.cache_expire = 180

; Default MIME-TYPE
default_mimetype = "text/html"

; Allow

Step 2

There are several items that you will need to amend before it is ready for use on your server:

  • Copy and paste the text in the box above into a new text file.
  • Inside your PHP folder, create a folder called ‘ini’.
  • Save the text file inside the ini folder you just created.
  •  Rename the file to the name of your website. For example ‘yourdomain.com.ini’.
  • Open the file in your favourite text editor.

From here, now you need to change some settings in the php.ini to suit your setup:

1. Change this to your time zone.

date.timezone = GMT

Here is a link to a list of valid time zones: Time Zones. You will need to do this to make sure the time and date is correctly reported to PHP scripts.

2. Change the below paths to the location of your website root folder.

; Base directories for htdocs, uploads and sessions
open_basedir = c:\sites\your_website\
;doc_root = d:\public_html\iisunderground\
upload_tmp_dir = c:\sites\your_website\
; Double backslash the session save path
; Option only applies when WinCache is not being used
session.save_path = c:\\sites\\sessions\\

The session.save_path must have double backslashes, so don’t forget. Also be sure to create the sessions folder. You should not store the sessions folder inside your web accessible folder for security reasons. These directories are used to prevent scripts from accessing locations outside of their web accessible folders. The defined folder is the “lowest” they can go. They can go forward  directories but not backwards beyond this set folder.

3. Change SMTP to the host you wish to use for e-mail.

; Sendmail / mail()
SMTP = localhost
smtp_port = 25
;sendmail_from = [email protected]

Normally this will stay at the default ‘localhost’ if you are using a mail server on your system. Change SMTP port to the port the mail server SMTP service uses. The default is 25 and normally won’t need to be changed. Un-comment sendmail_from (removing the semi-colon) if you intend to use a global address to send mail from. Lots of sites will use [email protected].

4.Change the extennsions.

; Extensions

There are lots of extensions to choose. If you ever find that your scripts tell you an extension or function is not available, you can often un-comment the extension (remove the semi-colon) here, save the file and restart IIS to get it working. The defaults enabled already will get you going for most applications.

WinCache is an extension for IIS that enables caching of PHP scripts. This allows them to run up to 5-10x faster than normal.

To enable WinCache, follow the installation tutorial and then set this extension to ‘1’ (enabled) rather than ‘0’ (disabled):

; Enable WinCache?

; If you disable WinCache be sure to set the session.save_handler to "files"
wincache.fcenabled = 0

The default settings will get you moving. If you ever come back to developing a site, you may need to disable WinCache to avoid the script being cached while you work on it. WinCache is designed for production systems only when using long cache time periods.

2. Configuring IIS to accept the new php.ini

The php.ini is now ready to be configured into IIS.

  • Open the IIS Manager from Start > Control Panel / Administrative Tools / IIS Manager.
  •  On the left hand side, select your website from the sites list.
  • From the icons, select Handler Mappings just as you would for installing PHP.
  • Find your php handler mapping in the list and double click it.
  • Under the executable box, you will have your PHP executable location. We need to edit it to include your php.ini file:

Example: c:\php\php-cgi.exe|-c c:\php\ini\your_website.com.ini
The '-c' modifier tells PHP to load a custom php.ini file.

  • Using the above example, modify it to your PHP location and your php.ini location.
  • Once you are done, click OK.

3. Test your configuration

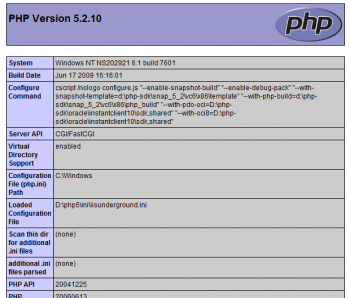
Your modified php.ini is now installed. All that is left to do is test your website to make sure it is working as intended. To do this, create a php file and include the following code:

<?php phpinfo(); ?>

Save it to your web accessible folder and then navigate to it in your browser. If you get something that looks like this, then you have been successful.

For each site you have now or create in the future, follow this process to make sure it has it’s own php.ini file. This ensures it will be secure and if you are hosting others, it makes sure they can’t access other peoples files by locking them down into their own folders.

IIS 8.0 with Free ASP.NET Hosting
Try our IIS 8.0 with Free ASP.NET Hosting today and your account will be setup soon! You can also take advantage of our Windows & ASP.NET Hosting support with Unlimited Domain, Unlimited Bandwidth, Unlimited Disk Space, etc.


About HostForLIFE.eu

HostForLIFE.eu is European Windows Hosting Provider which focuses on Windows Platform only. We deliver on-demand hosting solutions including Shared hosting, Reseller Hosting, Cloud Hosting, Dedicated Servers, and IT as a Service for companies of all sizes.

We have offered the latest Windows 2016 Hosting, ASP.NET Core 2.2.1 Hosting, ASP.NET MVC 6 Hosting and SQL 2017 Hosting.


Tag cloud

Sign in