
October 22, 2014 06:49 by
 Peter
Peter
SSL (Secure Socket Layer) is a cryptographic protocol developed by Netscape to supply communications security on the net. cryptographic technology uses 2 keys to encrypt data, one for public (public key) and another for recipient (secret key). SSL enabled websites communicate with a web server employing a security channel (secret key) that prevents tempering, eavesdropping (or merely say hacking). SSL is presumably used for a login section, payment system, on-line banking industry etc that's very sensitive info for a company or person. after we enable SSL for a web site the address can begin with "https://" (indicating hypertext Transfer Protocol Secure) rather than "http://".
To test this, you ought to have IIS installed. there's no need for further software like Visual Studio or any other web site development kit because only one hypertext markup language file can be tested. Follow the steps to enable SSL on Windows Server 2012 operating system; another operational System may have a slight distinction.
1. Open the IIS Manager and choose root computer name -> and double click on "Server Certifications". look at the image given below.
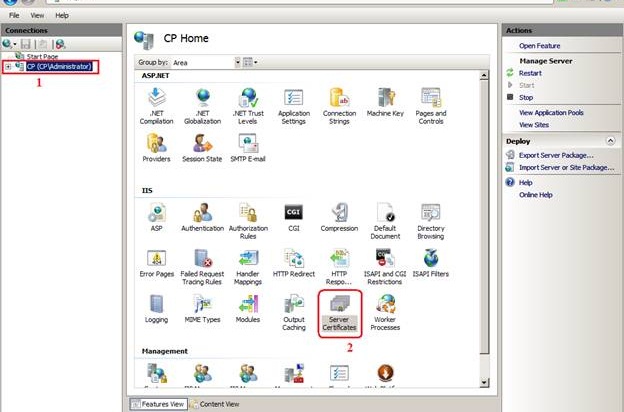
2. Now within the window that seems you'll find "Server Certificates" that are already installed. No problem if another one already exists, I recommend to delete all by choosing each and build a new one. If you're not using your system to host an expert web site then, delete all. Look at the correct panel; you'll find "Create Self-Signed Certificate"; click on it. You'll be prompted to enter the friendly name for SSL and click on OK button.
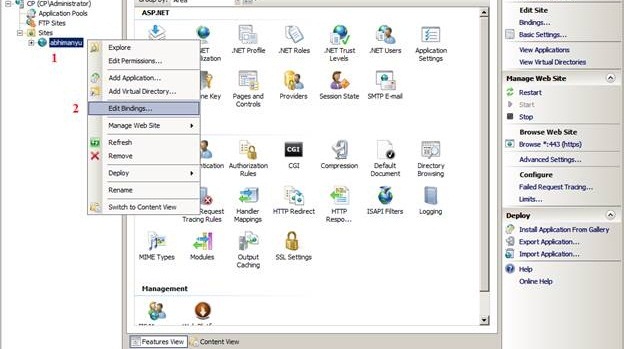
3. After clicking on the OK button you'll realize a new SSL entry. Currently navigate to "Site List" and right-click on that to choose the "Edit Binding" option. Consider the image given below.
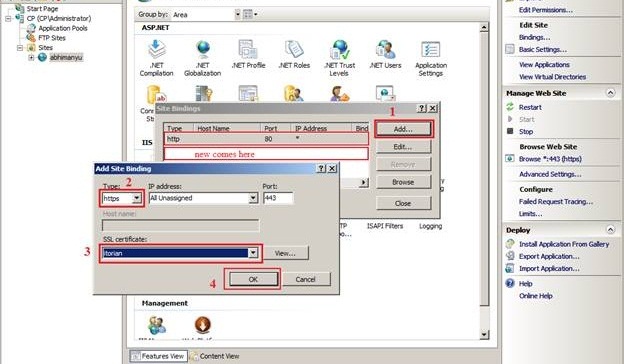
4. When you click on "Edit Binding", you'll get a new window requesting a protocol type. There is also 3 or four items, in my example there's only 1 by default that's "http". No downside if you've got many more. at least one ought to be there. now click on the "Add" button and within the window that appears choose the "Type" to "https" and "SSL Certificate" to "yourSSLname". after you are done, i recommend to delete all other protocol types, only keep https. shut the little window listing protocols at the end.
5. Now everything is configured and enabled for you. Let's take a look at it. Please note I only have the only protocol "https". Since browsers by default use http you've got to use here https while requesting via browser.
