I am here to introduce you to InProcess hosting in a .Net Core MVC 3.1 web application with the w3wp worker process.

Also, we will learn how to configure the source code to the IIS and run the application with debugging.
I suppose that since you are looking for hosting, you have already installed the necessary features for that.
The main feature you need to install for hosting in IIS is the IIS runtime support (ASP.NET Core Module v2) Hosting Bundle.
I have a Visual studio 2019 community version with pre-installed features for the development of an application.
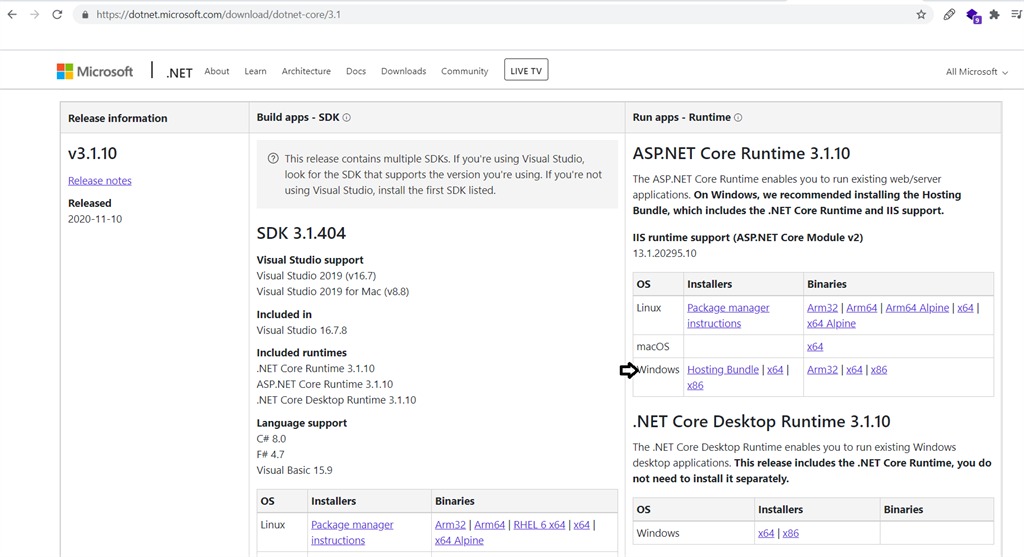
Let begin with downloading the ASP.NET Core Runtime Hosting bundle from Url https://dotnet.microsoft.com/download/dotnet-core/3.1
Step 1
If you haven't already installed the Hosting Bundle, please install it from the given link.
Step 2
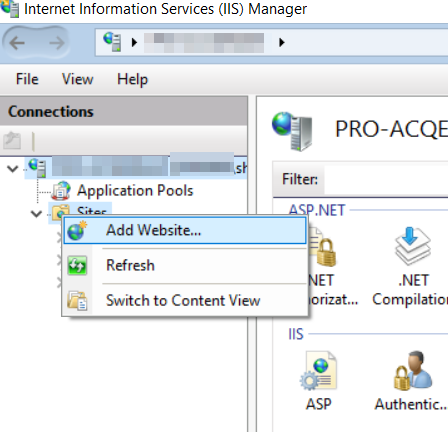
After installing, let's go to the IIS manager and map our Project directory source in IIS.
Step 3
Map your Source Code path.
Step 4
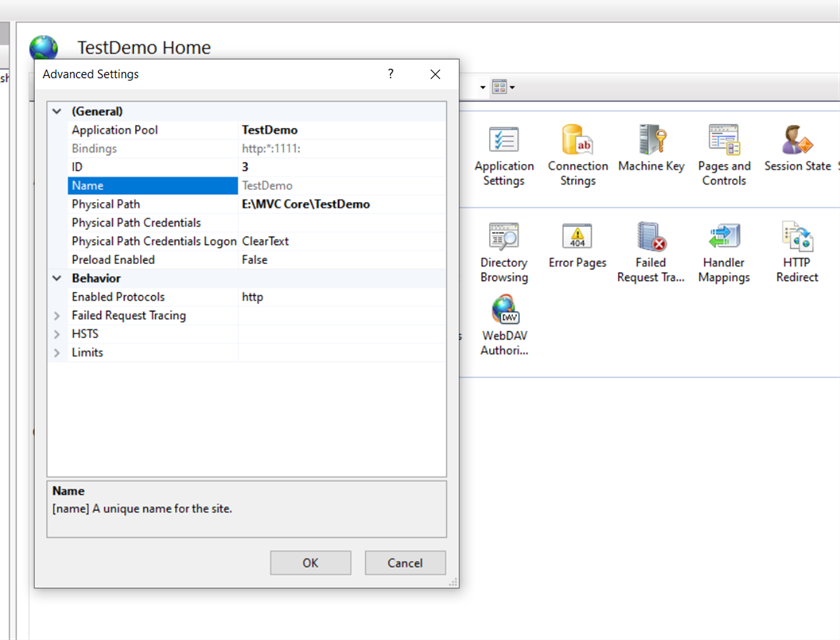
I have set the Application Pool setting with NetworkServices Identity. You can also choose another as per your requirement.
Step 5
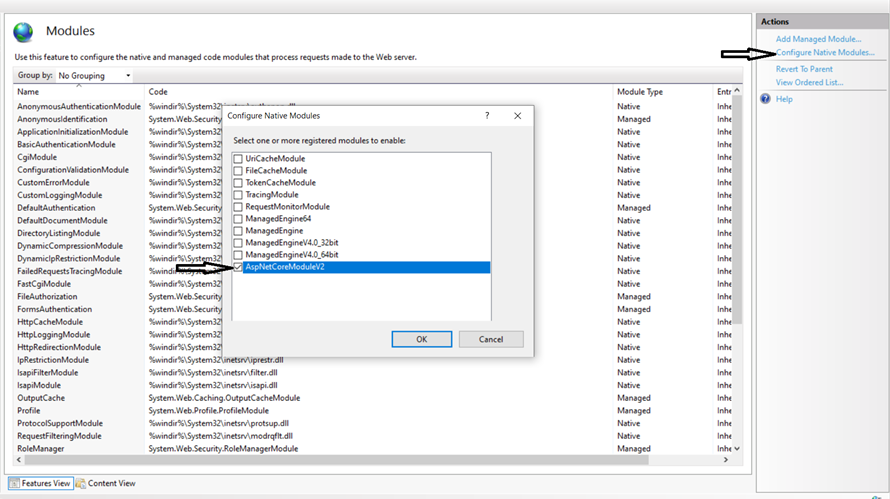
Add the Module AspNetCoreModuleV2 by following the below-given process in the screenshot.
You can also do this at the application level in your project's web.config
If you don't have web config right now, please follow step 6 given below and build your project.
<system.webServer>
<modules>
<add name="AspNetCoreModuleV2" />
</modules>
</system.webServer>
Step 6
Add the Marked Code in your Launchsettings.json
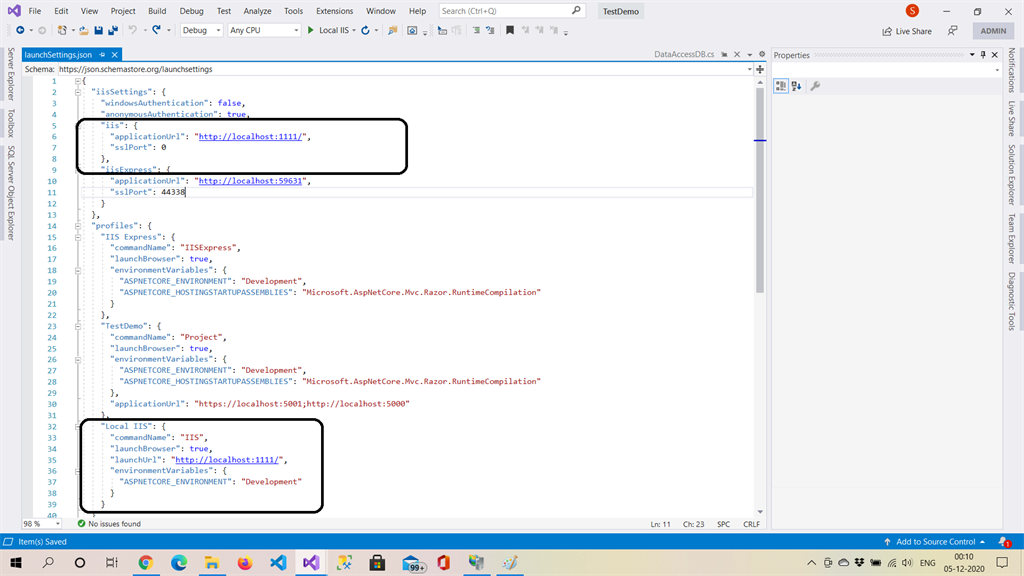
Add the below code marked in bold:
{
"iisSettings": {
"windowsAuthentication": false,
"anonymousAuthentication": true,
"iis": {
"applicationUrl": "http://localhost:1111/",
"sslPort": 0
},
"iisExpress": {
"applicationUrl": "http://localhost:59631",
"sslPort": 44338
}
},
"profiles": {
"IIS Express": {
"commandName": "IISExpress",
"launchBrowser": true,
"environmentVariables": {
"ASPNETCORE_ENVIRONMENT": "Development",
"ASPNETCORE_HOSTINGSTARTUPASSEMBLIES": "Microsoft.AspNetCore.Mvc.Razor.RuntimeCompilation"
}
},
"TestDemo": {
"commandName": "Project",
"launchBrowser": true,
"environmentVariables": {
"ASPNETCORE_ENVIRONMENT": "Development",
"ASPNETCORE_HOSTINGSTARTUPASSEMBLIES": "Microsoft.AspNetCore.Mvc.Razor.RuntimeCompilation"
},
"applicationUrl": "https://localhost:5001;http://localhost:5000"
},
"Local IIS": {
"commandName": "IIS",
"launchBrowser": true,
"launchUrl": "http://localhost:1111/",
"environmentVariables": {
"ASPNETCORE_ENVIRONMENT": "Development"
}
}
}
}
Step 6
Please make sure your project is running with InProcess hosting Model

<PropertyGroup>
<TargetFramework>netcoreapp3.1</TargetFramework>
<AspNetCoreHostingModel>InProcess</AspNetCoreHostingModel>
</PropertyGroup>
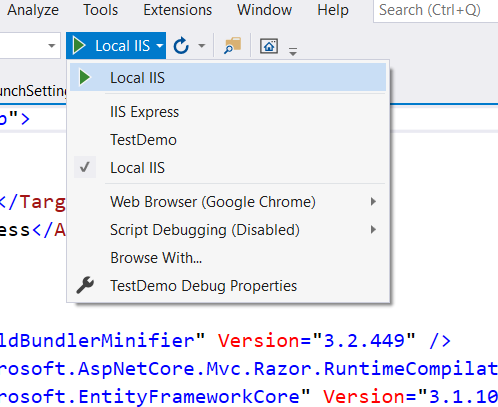
Step 7
As you have recently created a profile using launchsetting.json, now you can change the Debug property to Local IIS and run your application.
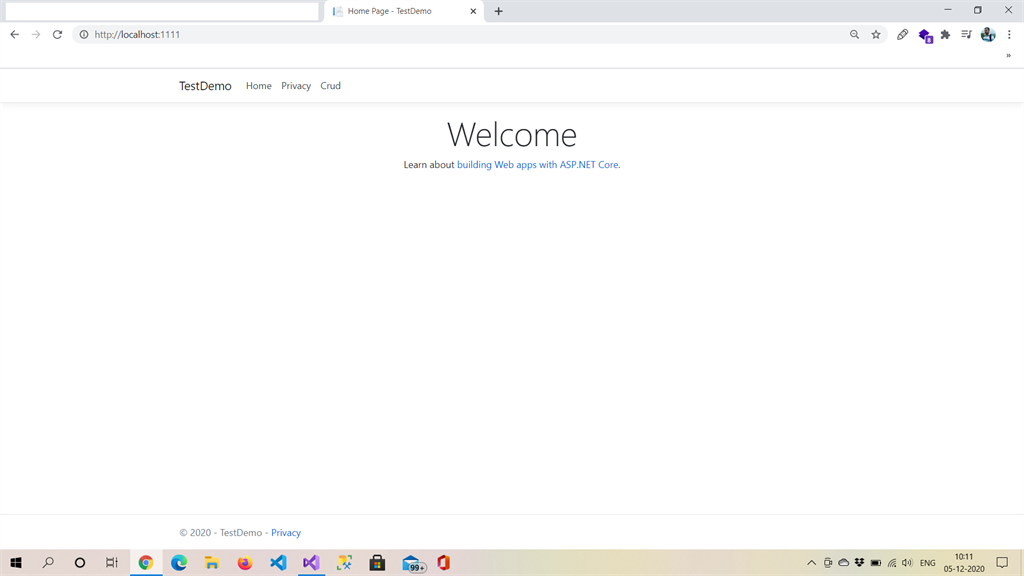
Here you can see the URL. Our mapping URL http://Localhost:1111 is working now and you can debug your code.
If you are still facing issues with reaching breakpoints, please add webBuilder.UseIIS(); to your program.cs.
public static IHostBuilder CreateHostBuilder(string[] args) =>
Host.CreateDefaultBuilder(args)
.ConfigureWebHostDefaults(webBuilder =>
{
webBuilder.UseIIS();
webBuilder.UseStartup<Startup>();
});
}
That's it