Listed below are the steps to deploy a web app in IIS.

Step 1
Publish your application.
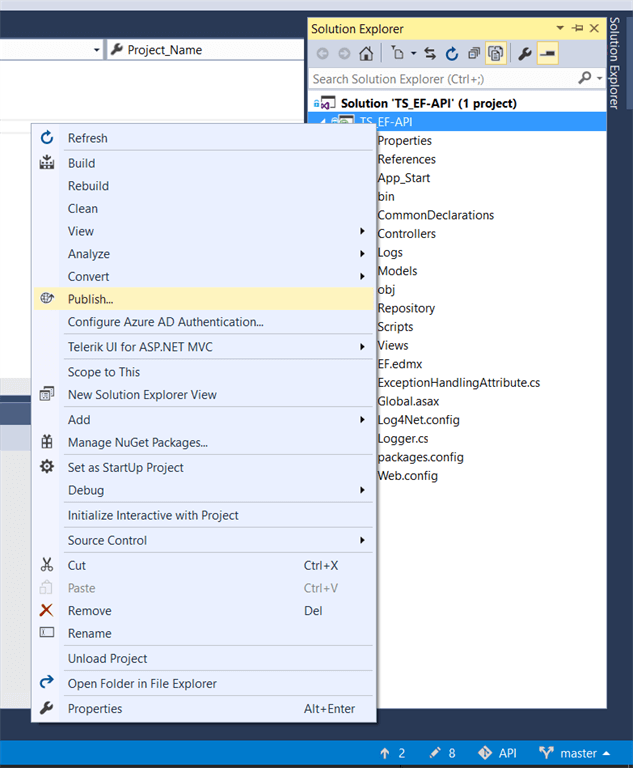
Right click your application and select "Publish".
In the publishing wizard, select the desired file system and set target location.
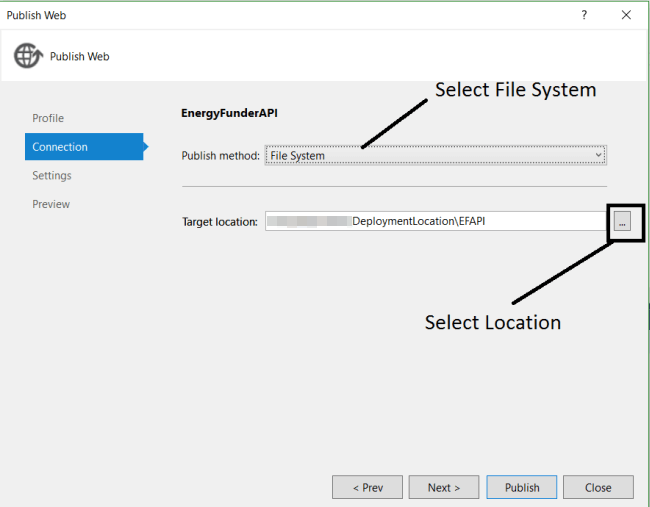
And now, click Publish button to publish your application to the targeted location. Once the application is published successfully, the following screen appears (if any errors occurs, it will notify you here).

Step 2
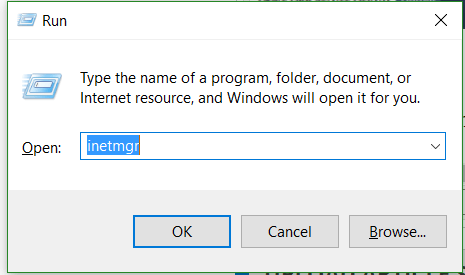
Type inetmgr in the "Run" dialog box to open IIS manager.
And, you will get to the below screen.
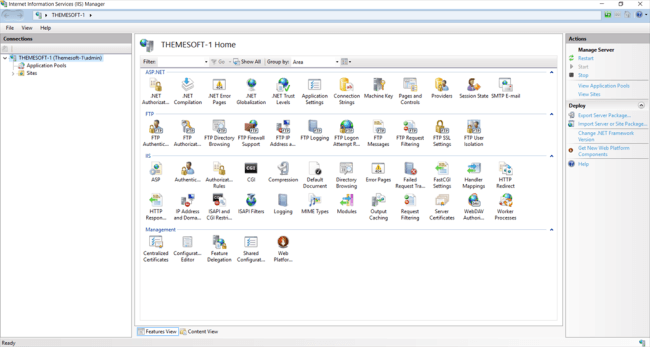
Expand the local computer, right click on Sites, and click "Add New Site", as shown below.
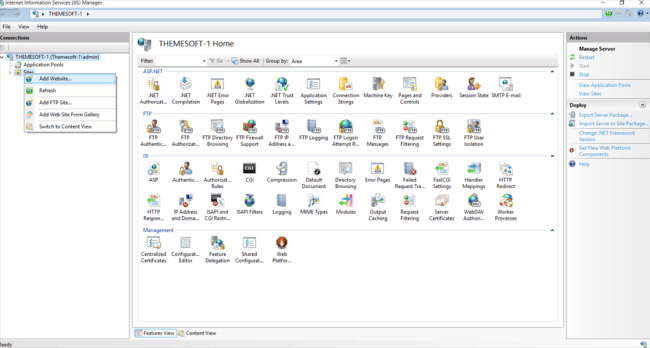
Type the name of the website. In my sample, it is "MyWebApp". Select the published file location (you have to manually add this port number to inbound rules of Windows Firewall later). And then, press OK.
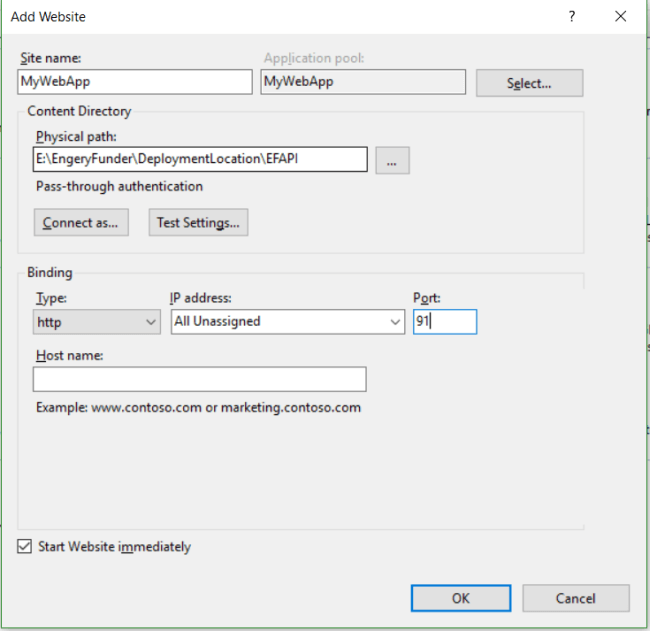
If a connection with that port number already exists, then give another port number.
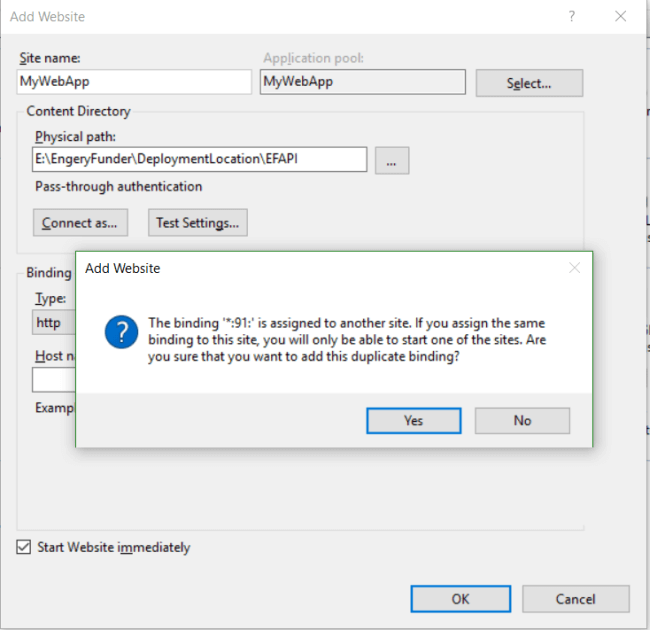
So, change the port number and press OK.
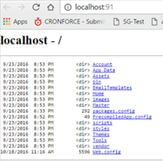
Browse to view the application.
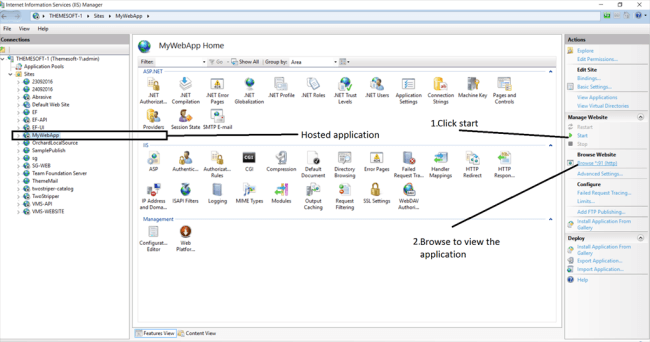
It's hosted on localhost.
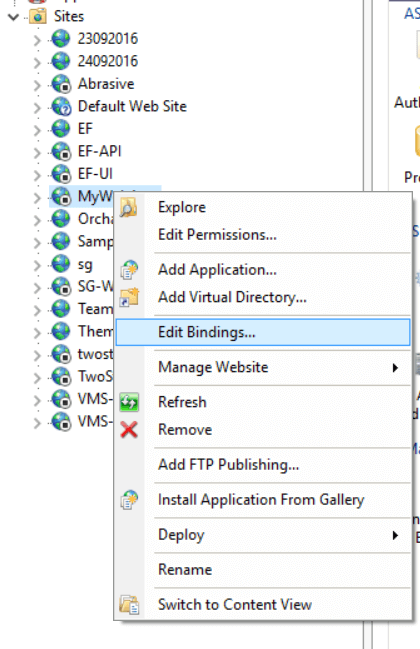
If you want to assign IP-address, right click your created site in IIS and select "Edit Binding".
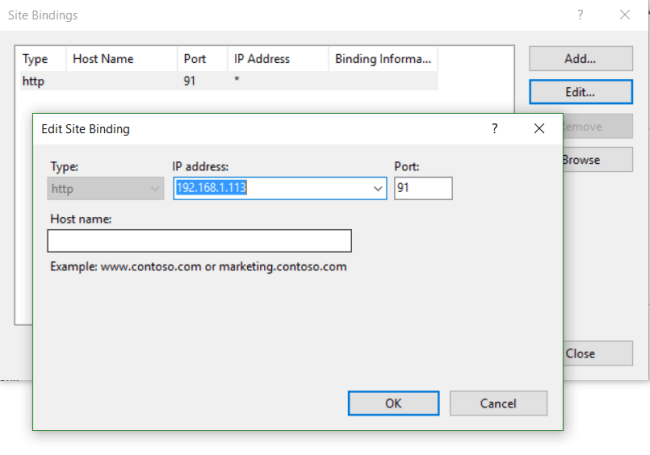
In "Site Bindings" window, click "Edit" and assign IP address.
Now, click OK and type this IP address with port in browser (ex: http://192.168.1.113:91/ ). You will see the following screen.
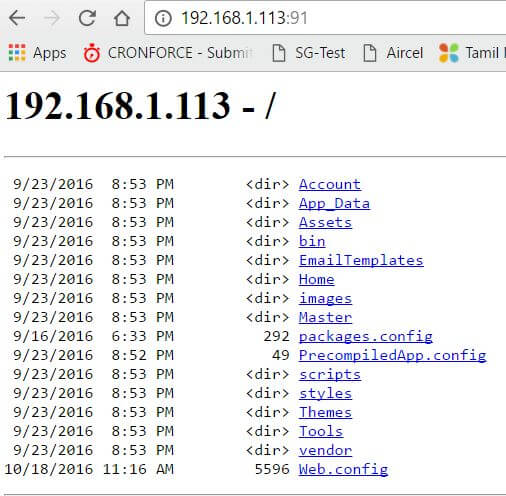
Now, you can see that our application is hosted with IP Address on IIS successfully.